DIY Projects for the Self-Sufficient Homeowner: 25 Ways to Build a Self-Reliant Lifestyle (25 page)
Authors: Betsy Matheson
Tags: #Non-Fiction

To Store Carrots:
Cut off greens and wrap them in small groups of newspaper. Bury paper packages in dry sand.
Building a Root Cellar
TOOLS & MATERIALS
Chalk
Eye protection
Ear protection
Construction adhesive
Concrete nails
Powder-actuated nail gun
Drill
Level
Deck screws
Circulating saw
Insect mesh
Sheet plastic vapor barrier
Foam insulation
Stapler
Stick up light
Fiberglass butt insulation
Paneling or drywall
Steel garage service door
Weather stripping
Masking tape
4d finish nails
Glue
Wood screws
Framing square
Sander
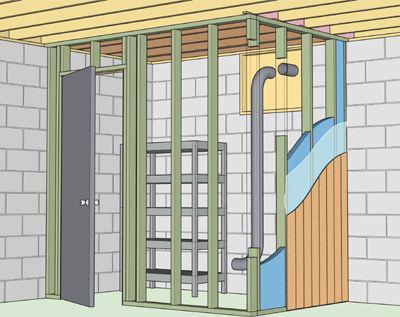
How to Add a Root Cellar to a Basement
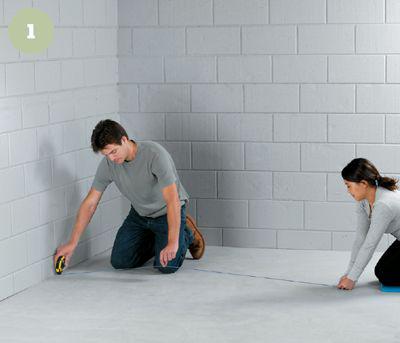
1 Outline the root cellar wall locations
on your basement floor with chalk or a chalkline. Don’t get too skimpy—the foot-print should be at least 4 × 6 ft. to make the project worthwhile.

2 Build 2 × 4 stud walls
with a framed rough opening for a door. Anchor the sole plates for the walls (use pressure-treated lumber) to the floor with construction adhesive and concrete nails driven into predrilled holes (or use a powder-actuated nail gun).
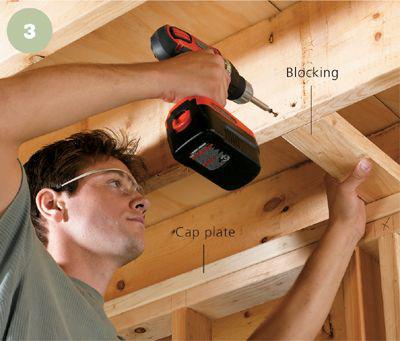
3 Use a level
to adjust the walls until they are plumb and then secure the cap plates of the framed walls to the joists above with deck screws. If the cap plate on the wall that’s parallel to the joists does not align with a joist, you’ll need to install wood blocking between the joists to have a nailing surface for the cap plate.
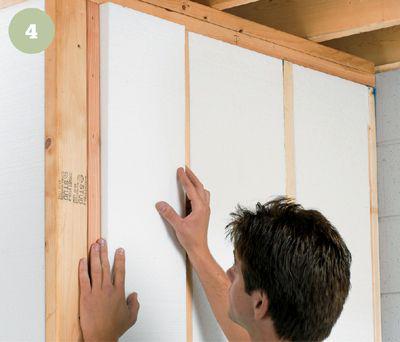
4 Insulate the interior walls
to keep the ambient basement heat out of the root cellar. Rigid foam insulation is a great choice for root cellar walls, since it is more resistant to mold and deterioration from moisture than fiberglass batts.
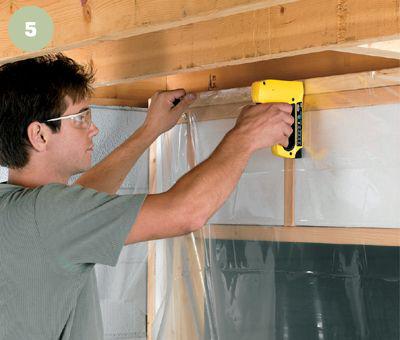
5 Staple a sheet-plastic vapor barrier
to the basement side of the walls where condensation is likely to form.
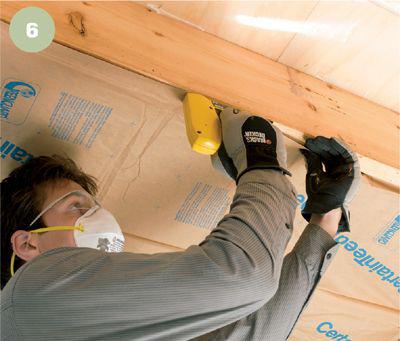
6 Also insulate the ceiling.
Line the joist cavities above the root cellar with sheet plastic before you install the insulation to create a vapor barrier there (the vapor barrier always goes on the warm side of the insulation). Use faced fiberglass batt insulation, or use unfaced fiberglass and install a ceiling covering such as paneling.

7 Install a wall covering,
such as paneling or drywall, over the vapor barrier on the basement side (required for fire resistance). You may cover the wall on the root-cellar side if you wish—there is little point in doing it for aesthetic reasons, but the wallcovering will protect the insulation from damage.
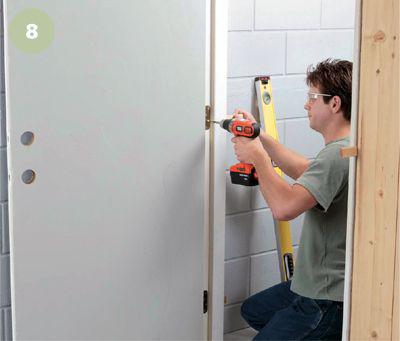
8 Hang the door.
A steel garage service door with a foam core is durable and well insulated. Be sure to install weatherstripping around the door to create a seal that minimizes heat transfer.
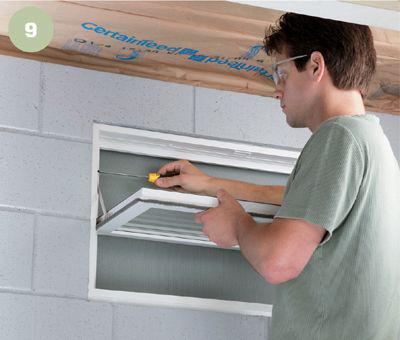
9 Remove the basement window sash,
if your cellar area has a window. (If not, install a vent in the rim joist—find information on installing a dryer vent for guidance.) Keep the window stop molding in the jambs intact if you can.