Chinese Brush Painting (15 page)
Read Chinese Brush Painting Online
Authors: Caroline Self,Susan Self

2.
Make the middle section as in the steps you followed above, with growth rings at the top and bottom.
3.
To make the top section, load the brush and lay it down slightly above the middle section. Push down, stop, and then push up 5 inches and off the page. Notice that you have made a darker area at the bottom of the section and a lighter area at the top.
To make a thinner stalk
on the bamboo, rotate your hand to the right but lift the heel of the brush a little off the paper, so you use less of the brush.
1.
Load the brush and try making a stroke with the heel slightly off the page. Did you make a narrower stalk this time?
2.
Try this several times, trying to keep the same pressure on the paper.
3.
Experiment with making thinner bamboo stalks by raising the heel more and using less and less brush.
4.
Try making a thinner stalk for the top section or for a younger bamboo stalk.
In making a design for bamboo, use thick and thin stalks and short and tall stalks as well as different kinds of leaf clusters.
Painting Joint Rings
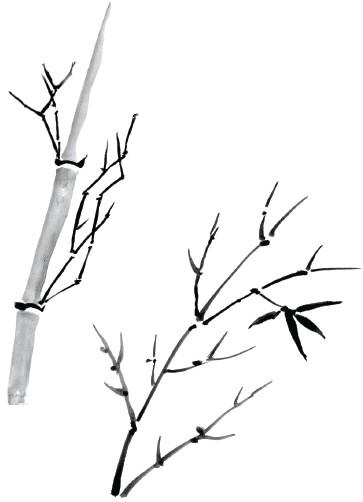
In between the sections is a joint ring. When bamboo is bending in the wind, the bending takes place only at the joint ring. Bamboo sections do not bend. They are rigid and are always painted straight. Notice that the beginnings and ends of the sections are darker. This is the area where the joint rings grow.
The joint ring is painted with one of the basic strokes, only shortened and turned sideways. The shape looks like the vertical hook.


1.
Load the small brush with dark mix and hold your hand in position #1.
2.
Press the tip of the brush up and to the left, stop, drag your arm down very slightly, swing to the right 1 inch, stop, and press and lift quickly upward, making a small hook.
3.
Practice the joint ring stroke many times.
The joint ring is an important stroke and must fit into the space between the two stalk sections. Learn to make this stroke in many sizes to fit different size stalk sections.

Painting Branches
The small branches that hold the leaves grow off the joint area. They grow on opposite sides up the stalk, first one side and then the other. It helps to know where the leaf clusters will be placed before painting in the branches.
As shown in the examples here, very small branches can be painted with simple strokes of the small brush. Other branches can be made with the bone stroke and the tip of the brush to show the joints in the branches.
The rule is to have no more than two branches coming from the same joint. The branches grow off only one side of a joint. The side changes from one joint to the next. For example, the stalk here has branches on the right side for the lower joint and branches on the left side for the upper joint.

Painting Leaves
Bamboo leaves are very important in a painting. The viewer notices them first because they are so dark.
Leaf Patterns
The patterns of bamboo leaf clusters have been studied and copied for centuries.
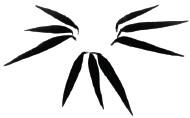
Clusters usually have three, four, or five leaves, but near the top of the stalk they may have only one or two leaves. Usually, one leaf is larger. It is called the “host,” and the smaller leaves around it are called “guests.”

In every pattern, each leaf points in a different direction. The leaves connect to the same branch and fan out from that point. In the painting below, notice how the leaves point in different directions. Never paint all the leaves in one direction or make them the same size or length.

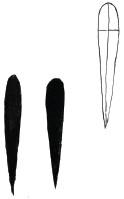
The bamboo leaf is similar to the shape of the orchid petal, only a little fatter and evenly balanced on each side of the center vein.

The widest part of the leaf stroke is made after it touches the paper, just before lifting the brush. Leaf ends should always be straight and pointed. This happens better when you take a breath before the stroke and let it out as the stroke finishes.
Painting a Leaf
1.
Practice first using your finger instead of the brush. Touch your finger to the paper, press, drag slightly and slowly, and lift it little by little, keeping the tip of the finger in the center of the stroke.
2.
Load the large brush in the dark mix, rolling it forward and back in the dish so that all the hairs have paint. Tap off the excess and hold your hand in position #1.
3.
Touch the brush tip to the paper, TAB, drag slightly, press, lift little by little, LOB and make a point.
4.
Practice this many times until the stroke is balanced with a straight point, keeping the tip of the brush in the center.

