Maida Heatter's Book of Great Chocolate Desserts (60 page)
Read Maida Heatter's Book of Great Chocolate Desserts Online
Authors: Maida Heatter

Cut or break the chocolate into coarse pieces and place it in the top of a double boiler over warm water on low heat. (Milk chocolate must be melted very slowly, the slower the better—it should not ever get really hot.) Cover until partially melted.
Meanwhile, cut the marshmallows into quarters. (Some people use scissors; if they stick to the marshmallows, moisten them slightly in cold water.) Set the marshmallows aside.
Uncover the chocolate and stir until completely melted and smooth. Pour about half of the chocolate into the foil-lined pan and spread it to cover the bottom of the pan; it will be a thin layer. Sprinkle with about half of the nuts and then place the marshmallow pieces evenly over all. Stir the remaining chocolate well and drizzle it over the top. It will not cover the top completely but it should be drizzled on so that it holds the nuts and marshmallows in place. Now top with the remaining nuts.
Refrigerate until firm. Remove from the pan and peel off the foil. With a long, thin, sharp knife cut the candy into 16 or 24 large squares. Wrap them individually in cellophane or wax paper. Or wrap the whole block securely in plastic wrap or aluminum foil and do not cut into squares until serving time. Or gift-wrap the whole block in one piece.
This should be stored in the refrigerator to keep the chocolate fresh-looking and to avoid any discoloring (it will keep for weeks). I think it is best to remove it from the refrigerator for a while before serving so the chocolate is not too brittle, but that is a matter of taste.
NOTE
:
1⅔ cups of miniature marshmallows may be substituted for the cut-up large marshmallows, but Rocky Road connoisseurs like it better with larger pieces. Some even cut the marshmallows only into halves. And some leave them whole.
VARIATIONS
:
Walnuts or cashews are frequently substituted for pecans. And whole dried apricot halves (unchopped) or dried pitted prunes (unchopped) are often used in place of the nuts. I think any dried or candied fruits would be good either in place of or along with the nuts.
French Chocolate Mint Truffles
20
T
RUFFLES
These are dense, bittersweet chocolate candies flavored with mint, shaped to resemble natural truffles. They are easy fun to prepare and should be made at least a day before serving. Many truffle candies must be refrigerated until serving—these must not. They are served at room temperature. They may be served as dessert, with dessert, after dessert, or between meals. They are especially good after dinner with espresso and/or Cognac.
6 ounces semisweet chocolate
2 ounces (½ stick) sweet butter, cut into small bits
2 egg yolks
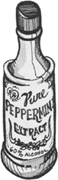
Approximately ¼ teaspoon peppermint extract
Unsweetened cocoa powder (preferably Dutch process)
Approximately 2 ounces additional semisweet chocolate (for coating the finished candies)
Break or chop the chocolate into medium-size pieces. Place it in the top of a small double boiler over hot water on low heat. Cover and let stand until partially melted. Uncover and stir until completely melted.
Remove the top of the double boiler temporarily. Add the butter, a
few pieces at a time, and stir with a small wire whisk after each addition until smooth.
In a small bowl stir a bit of the chocolate into the yolks and then stir the yolks into the chocolate.
Replace over the hot water on low heat and stir gently with a rubber spatula for about 2 minutes.
Now, remove the top of the double boiler. Stir in the peppermint extract, adding just a few drops at a time. Taste it—make it as minty as you like (I make it strong), but add it slowly and taste it carefully. Some mint extracts taste unpleasant if you use too much.
Place the top of the double boiler in a bowl of ice and water. Stir constantly with a small wooden spatula until the mixture is firm enough to hold a definite shape.
Place a piece of wax paper in front of you. Use a slightly rounded teaspoonful of the mixture for each truffle. Place them in mounds on the wax paper, forming 20 mounds.
If the mixture is firm enough, the truffles may be rolled into shape immediately. But if it is too soft, let it stand uncovered at room temperature for about half an hour or until firm enough to handle.
Spread out two more large pieces of wax paper. Onto one, strain a generous amount of unsweetened cocoa. Coat the palms of your hands well with the cocoa.
Pick up a mound of the chocolate mixture, roll it between your hands to form an uneven ball (real truffles are very uneven), then roll it around in the cocoa and place it on the other piece of wax paper. Continue to shape all of the truffles, coating your hands with cocoa before shaping each truffle.
Let the truffles stand overnight at room temperature, uncovered or loosely covered, so the outsides dry a bit.
The 2 ounces of additional chocolate must be ground to a fine powder; it may be done in a food processor, a blender, a nut grinder, or on a fine metal grater. Spread the ground chocolate on wax paper and roll the truffles around in it to coat them again.
These are best when they are very fresh, before they dry out too much and while they are still creamy soft in the centers. They may be kept at room temperature for a day or two but they should be refrigerated or frozen for longer storage. (Bring them back to room temperature before serving.)
VARIATIONS
:
Truffle variations are endless. Here are just a few. To make plain chocolate truffles simply omit the mint. Then, if you wish, vary some by adding ground or very finely chopped nuts (toasted hazelnuts are special) or chopped shredded coconut. Or rum-soaked raisins or dates, or cut up soft, dried apricots. Or some diced candied (or drained preserved) ginger. Or chopped candied chestnuts. And/or a teaspoon or two of rum, Cognac, bourbon, Grand Marnier, Amaretto, whiskey, etc. For a coffee flavor add coffee extract. Or roll the shaped truffles in very finely chopped nuts or coconut in place of the cocoa and ground chocolate. Etcetera.
Chocolate-Covered Strawberries
1
¼
P
OUNDS OF
D
IPPED
B
ERRIES
This is fun!
Chocolate-covered strawberries have become very popular in the last few years with a group of elite food people. Although they are the simplest thing imaginable—any child can make them—they are featured by some of the country’s most expensive/exclusive/ posh candymakers, where they cost a fortune.
Since they are made with only strawberries and chocolate, their quality depends entirely on the quality of the berries and the chocolate.
Naturally these will be more dramatic if you use large berries, although small berries are very cute and are often more delicious. If possible, use berries with stems (which I have seen in other parts of the country but have never been able to buy in Florida). The berries must be ripe but not soft—do not use any berries that have soft spots. Do not wash the berries; just brush them gently with a dry pastry brush. (But if you would feel better about washing them, swish them around quickly in a large bowl of cold water and then drain on several thicknesses of paper towels for hours until they are completely dry.)
Some chocolate dippers refrigerate the berries for a few hours before dipping them: “If the berries are cold the chocolate sets faster and there is less chance that it will streak or discolor.” Others let them stand on a rack at room temperature for a few hours before dipping: “To dehydrate the surface.” I’ve tried both and I don’t see any difference.
You can use any kind of sweet, semisweet, bittersweet, or milk chocolate. It may be real chocolate or compound chocolate (see page 5).
These may be served as dessert, with dessert, or as a decoration for some other dessert. Or serve them as candy.
They are perishable but they do keep for the better part of a day.
Line the bottom of a tray large enough to hold the dipped berries with wax paper or aluminum foil.
One small “pint” box of berries will be enough to serve four people if you are serving these as a dessert. The strawberries in such a box will measure almost 4 cups and will weigh 1 pound. For one such box you will need 4 ounces of chocolate.
Break up or coarsely chop the chocolate and place it in the top of a small double boiler over warm water on low heat. Cover until the chocolate is partially melted. Then uncover and stir until the chocolate is all melted and completely smooth.
Remove the top of the double boiler for easy handling but if the chocolate starts to thicken replace it over warm water.
Hold a berry by the stem or by the green leaves (the hull) and dip it to about three-quarters length (not all the way—let some of the red berry show at the top). The chocolate coating should not be too thick and heavy nor should it be as thin as on a Good Humor. Wipe excess chocolate off against the rim of the pot (but don’t wipe so much that you leave that section uncovered). Place the dipped berry on its side on the lined tray. (If the chocolate gets too low to dip the last few berries, transfer it to a small custard cup or a small wine glass.)
If you have used compound chocolate it will set quickly at room temperature and will not have to be refrigerated. If you have used real chocolate place the tray of dipped berries in the refrigerator only until the chocolate is firm, no longer. Then gently lift each berry by the stem or leaves to release it from the paper.
Now, do not refrigerate these. They should be stored and served (within 24 hours) at room temperature. If they are refrigerated the chocolate will sweat when returned to room temperature. And if they are cold when they are served, the chocolate will be brittle and the berries will be difficult to eat.
(If you have some leftover melted chocolate, save it and melt it again the next time you dip berries. Or use it to make Chocolate Slabs (see page 263) for some other dessert.)
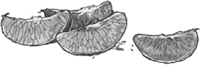
NOTE: Candymakers also dip orange sections—you must be sure that the membrane is not broken and that they are seedless oranges; dip them to cover about two-thirds of the section. Or place toothpicks into 1-inch pieces of banana, and dip to cover all or part of the banana. Or dip individual seedless green grapes on small stems. Or, or, or …
Stuffed Figs au Chocolat
A
PPROXIMATELY 24
F
IGS
These are more like candy than dessert but whatever they are, they are delicious, unusual, elegant, beautiful-looking, and fun to make. The figs are stuffed with one chocolate and then coated with another chocolate. They are finger-food, like chocolate-covered cherries. There is very little cooking involved, but quite a bit of handwork—all of which goes quickly.
They may be refrigerated for a week or so, or they may be frozen.
1 pound (about 24) dried brown figs (although they are dried, they must be soft and moist, not hard and dry; and, although I have used only brown figs to stuff, I don’t see any reason why black ones would not be equally good)
It is best to use figs that have been packed loosely rather than those that have been pressed into an almost solid mass. (However, I have used the pressed ones—it is just a bit more work.)
Press each fig between your fingers to shape it so it will stand upright when stuffed.
With a small, sharp knife cut a slit through the bottom of each fig opposite the stem. Extend the slit about halfway up to the stem on both sides.
With your fingers, open each fig and form a large pocket to hold the stuffing.