No-Bake Gingerbread Houses for Kids
Read No-Bake Gingerbread Houses for Kids Online
Authors: Lisa Anderson,Photographs by Zac Williams

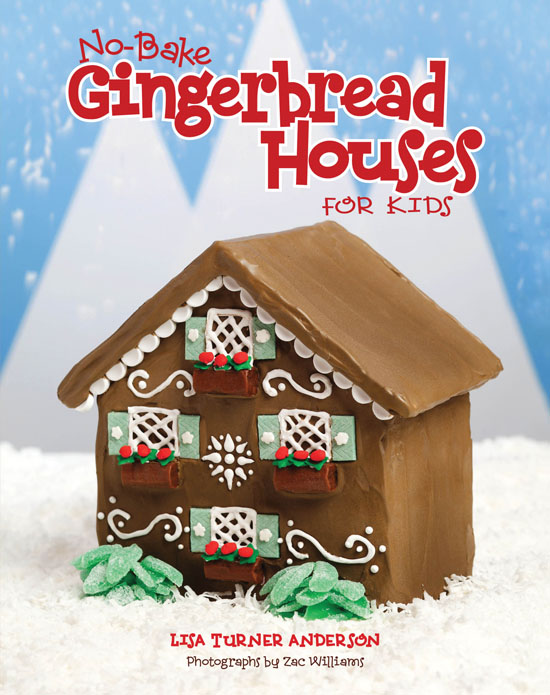
Lisa Turner Anderson
Photographs by Zac Williams
No-Bake Gingerbread Houses for Kids
Digital Edition v1.0
Text © 2010 Lisa Turner Anderson
Photographs © 2010 Zac Williams
All rights reserved. No part of this book may be reproduced by any means whatsoever without written permission from the publisher, except brief portions quoted for purpose of review.
Gibbs Smith, Publisher
PO Box 667
Layton, UT 84041
Orders: 1.800.835.4993
www.gibbs-smith.com
Library of Congress Catalog-in-Publishing Data
ISBN-13: 978-1-4236-0590-4
ISBN-10: 1-4236-0590-X
1. Gingerbread houses. 2. Cookery (Cold dishes) I. Title.
TX771.A58 2010
745.5âdc22
2010003541
For Matt and Malcolm
Table of Contents
Making no-bake gingerbread houses is easy, fun, and best of all, fast! This book will show
you how to make houses, castles, cottages, and more using graham crackers, cookies, ice
cream cones, waffle bowls, and candy. There's no need to mix dough, roll it out, bake it,
and wait for it to harden. The house structures in this book take only minutes to make,
meaning you can get to the decorating more quicklyâand that's the best part. Before you
begin, you just need to know a few tips. Then you'll be on your way to having fun!
A large piece of cardboardâat least 1 foot by 1 footâis the best base to build your house
on. It's sturdy enough to pick up so that you can move your house easily. Be sure to cover
your cardboard with waxed paper or aluminum foil so the frosting doesn't seep through.
Even if the house is small and doesn't take up much room on the cardboard, you'll still
want a large base so that you have plenty of room for decorating. The instructions for most
of the houses in this book suggest that you spread icing around the house, such as green for
grass or white for snow. Covering the whole cardboard base with icing helps your house look
nice and neat.
While not all the houses in this book are made with graham crackers, most of them are.
Building structures out of graham crackers requires a few tricks.
Most houses in the book require that you cut graham crackers into shapes or smaller
pieces. Instead of trying to break them with your hands, have an adult use a serrated knife,
such as a steak knife, to gently saw the cracker along the lines until the unwanted piece
breaks off. If you try to break them with your hands, the pieces will usually break off
unevenly.
The diagrams for each house will show you the sizes and shapes of the graham crackers you
need. The blue parts of the diagram are the pieces of the crackers that need to be cut off
and thrown away.
For many of the houses, you will need to “glue” two or more graham crackers together with
icing to make a larger front, side, back, or roof piece. To help the pieces stay together,
you will need to “glue” a quarter graham cracker across the seam, as shown in Diagram 1.
This will help you make larger and more interesting houses without worrying about them
falling apart. When you put the house together, make sure the quarter crackers are on the
inside of the house.
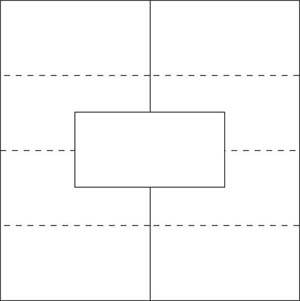
Diagram 1
Making gingerbread houses requires special icing called royal icing. It is made with egg
whites, water, and powdered sugar, and it is very strong, like glue. It dries to a hard
candy-like finish that will last for months. You can use either raw egg whites or meringue
powder (which has dried egg whites) to make the icing. While both versions make equally
strong icing, I prefer using meringue powder because it's easier to use and safer to eat
than raw egg whites. You can find meringue powder at craft or cake decorating stores.
| 3 egg whites |
| 1/2 teaspoon cream of tartar |
| 4 cups powdered sugar |
Beat the egg whites and cream of tartar together until the meringue has formed stiff peaks
(meaning when you lift the beaters out of the meringue, it stands up straight and doesn't
fall over). Beat in the powdered sugar, 1 cup at a time, until mixed together and smooth.
| 1/4 cup meringue powder |
| 1/2 cup water |
| 4 cups powdered sugar |
Beat the meringue powder and water together until the meringue has formed stiff peaks
(meaning when you lift the beaters out of the meringue, it stands up straight and doesn't
fall over). Beat in the powdered sugar, 1 cup at a time, until mixed together and smooth.
Tinting the icing with food coloring is a fun and easy way to add more color to your
houses. Gel food coloring works the best because it is super concentrated and makes deep,
bright colors. You can find gel food coloring in most grocery stores, but the gels at craft
and cake decorating stores come in many more colors and are even more concentrated.
When tinting your icing, use a craft stick or toothpick to add just a tiny bit of gel to
the icing. A little bit goes a very long way. You can always keep adding more, but you can't
add less!
The easiest way to use the icing to decorate your house is to spoon some of it into a
quart-size ziplock bag. Squeeze the air out of the top, then seal the bag. Double-check and
make sure it is completely sealed or else the icing will come out the top when you squeeze
the bag. Cut off a bottom corner of the bag and squeeze the bag to push the icing through
the hole. The smaller the hole, the thinner the line when you're piping the icing. You'll
usually want a thinner line when decorating, but you can use a thicker line when “gluing”
the house together.
Any icing that is left in the bowl needs to be covered with plastic wrap so that the
plastic wrap is touching the surface of the icing. Icing that is exposed to air will turn
hard quickly and you won't be able to use it.
You can store royal icing in the fridge for a few days.
The projects in this book have suggestions of what candy to use so that your house looks
the same as the one in the photo. But if you have an idea for a different color or shape of
candy for the house you're making, go for it! The best part of making gingerbread houses is
using your imagination and playing with different candies to come up with a cool design
that's all your own. You can use any candy you want, with one exception: taffy. After taffy
is unwrapped, it will eventually “melt” and run down the sides of your house. Trust meâit
doesn't look good!
Now that you know some tips and tricks and important information, go have some fun, be
creative, and build some really cool no-bake gingerbread houses.
Demo version limitation
| Volume Measurements | Weight Measurements | Temperature Conversion | |||
|---|---|---|---|---|---|
| U.S. | Metric | U.S. | Metric | U.S. | Metric |
| 1 teaspoon | 5 ml | 1/2 ounce | 15 g | 250 | 120 |
| 1 tablespoon | 15 ml | 1 ounce | 30 g | 300 | 150 |
| 1/4 cup | 60 ml | 3 ounces | 90 g | 325 | 160 |
| 1/3 cup | 75 ml | 4 ounces | 115 g | 350 | 180 |
| 1/2 cup | 125 ml | 8 ounces | 225 g | 375 | 190 |
| 2/3 cup | 150 ml | 12 ounces | 350 g | 400 | 200 |
| 3/4 cup | 175 ml | 1 pound | 450 g | 425 | 220 |
| 1 cup | 250 ml | 2-1/4 pounds | 1 kg | 450 | 230 |