Sew Birthday Fun (10 page)
Authors: Mandy Shaw

4. To make the house shape at the top of the hanging, measure and mark 12.8cm (5in) in along the top and down the side on each of the corners. Join the marks up with a ruler and cut off.
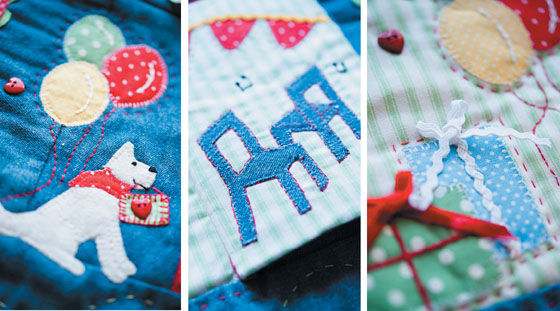
5. Referring to Templates appliqué the waiting dog and three balloons onto the denim to the left-hand side of the party scene and the pennant to the right-hand side using hand or machine blanket stitch. (Note: embroidery details and embellishments will be added later.)
When appliquéing such small pieces, if working by hand use a small sharp needle, or if working by machine use a very fine needle, either 80/12 or 70/10.
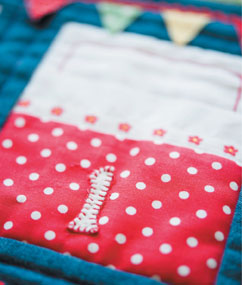
1. Use the name/date holder template to cut two rectangles from yellow felt and use fusible webbing to fuse together. Mark on the aperture (dotted line on template) and cut out. Repeat to make a second holder. Place the pieces of plastic behind the apertures on the holders and place this onto scrap paper. Machine stitch close to the inside edge. (The paper prevents the plastic from sticking to the machine and is torn away once the stitching is complete.) Blanket stitch along the top edge of the holder using two strands of red embroidery thread.
2. Pin the holders to either side of the top bed and blanket stitch in place by hand. Appliqué a fabric heart on either side of bed number 7, just above the holders, and blanket stitch by hand.
1. Layer up the front, the wadding (batting) and the lining fabric (see Techniques:
Making a quilt sandwich
).
2. Stitch-in-the-ditch around each of the beds: you can either choose to do this by hand or by using a sewing machine with a walking foot attachment. Then if you are confident with your sewing, machine stitch 6mm (
1
⁄
4
in) away from the edge.
3. Machine stitch around the name and date holders, keeping the top edge unstitched so you can change the child’s name and date as appropriate. Hand-stitch a running stitch outline around the hearts and the balloons using two strands of red thread. Cut a 7.5cm (3in) piece of narrow ric-rac and attach it with two small heart-shaped buttons to the top of the pennant at either side to make a ‘hanger’, following the photograph as your guide. Backstitch the strings of the balloons. (Note: the dog is embroidered later.)
4. Make a cardboard template measuring 10cm x 5cm (4in x 2in). Use the template to mark a pillow onto each of the beds, then embroider with a variety of stitches: chain, blanket, running stitch and backstitch have been used.
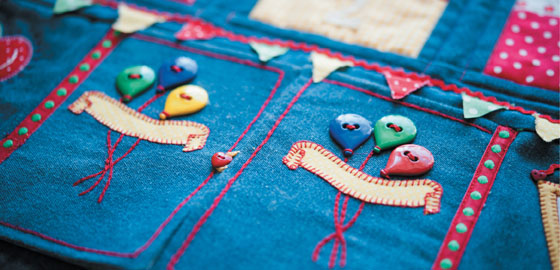
1. Appliqué the banners (see
Templates
) to the front of the remaining two pieces of denim measuring 11.5cm x 16.5cm (4
1
⁄
2
in x 6
1
⁄
2
in), positioning them 5cm (2in) down from the top edge.
2. Cut two pieces of interfacing measuring 15.5cm x 10cm (6in x 4in) and spray glue to the wrong side of the remaining green stripe lining fabric, making sure it is positioned centrally on the fabric.
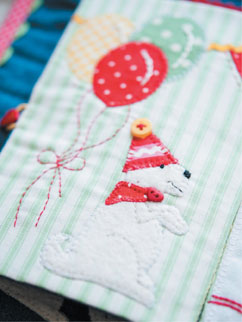
3. On one of the door lining pieces, appliqué the three balloons, bunting flag and party dog wearing his party hat and scarf (see
Templates
). On the other door, appliqué the musical chairs and the bunting flags. (When positioning the bunting flags, make sure they will line up with the bunting on the central party scene.) Sew on the narrow yellow ric-rac along the top of the bunting flags.
1. Chain stitch in white for the highlights on the balloons, in blue for the candles, and in yellow for the candle flames. Backstitch the balloon strings in red, the dog’s mouth in black, the dog’s arms and leg definition in white. Work a French knot in black for the dog’s eye. Sew a small yellow button on top of the dog’s hat. Quilt around the bunting flags, tablecloth, presents and balloons with a long running stitch using red thread.
2. Embroider the musical notes with backstitch and French knots. Sew around the chairs with red backstitch, adding the line details as marked on the templates. Satin stitch the dog’s nose in black.
1. Place a denim and green stripe door together with right sides facing and stitch immediately next to the interfacing, but not on it, and leaving the hinge side of each door unsewn. Clip the corners and turn the right way out. Press.
It’s a really lovely idea to personalize your quilt by appliquéing or embroidering on the child’s name.
2. Place the 1.3cm (
1
⁄
2
in) tape on the hinge (raw edge) of the door front, just covering the raw edges. Pin and sew the edge of the tape that is furthest away from the raw edge. Place the doors in position; pin and sew all the way around the tape (including the edge you have just sewn) through all layers of the hanging.
3. Sew on a heart-shaped button handle half way down the left-hand door. Sew two 1.3cm (
1
⁄
2
in) bar tacks (see Techniques:
Making bar tacks
), one on the opening edge of each door half way down. Sew on a group of three balloon buttons above the banners on the front of each door and chain stitch the balloon strings with red thread.
1. To add the bunting beneath each row of beds, cut 36 triangles for the flags from your fabric scraps. Draw slightly wiggly lines to mark the position of the bunting strings across the quilt. Pin on 12 flags along each line and then sew them in place with a straight line of stitching close to the top edge of the flags. Place the narrow ric-rac over the stitching line and sew in place. Sew a small yellow button at the end of each string of bunting.
2. Fold back each door and mark the position to sew a button on to fasten the door back.
3. Embroider a running stitch border at the base of the tablecloth. Sew a backstitch red ribbon using two strands of embroidery thread on one of the presents and top with a red ribbon bow. Sew white ric-rac to the other present and top with a white ric-rac bow. Sew a yellow star stitch for the cake decoration.
4. Sew a small red heart-shaped button onto the dog’s present and the large yellow button in the middle of the top row. Sew one half of the large popper to the right of the table just above the presents.
5. Bind the wall hanging (see Techniques:
Using ready-made binding
).
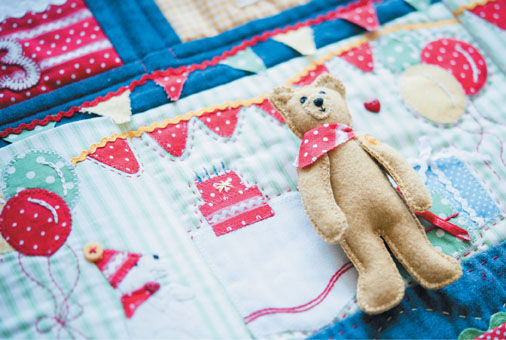
1. Use the Bertie the bear pattern (see
Templates
) to trace one bear body and two arms onto freezer paper (if you have it) or plain paper (if you don’t); cut them out.
2. Fold the piece of gold felt in half. If you are using freezer paper, iron the pieces onto the felt; if you are using plain paper, pin the patterns onto the felt.
Do not cut out
. Machine stitch all the way around the body and arm templates, close to the edge and leaving no gaps. Neatly cut very close to the stitching line.
3. Hand blanket stitch all the way around the body and arms using two strands of embroidery floss or one strand of coton à broder.
4. Cut a slit in one layer of the bear’s neck and arms as indicated on the patterns, gently stuff with a little polyester stuffing, then stitch the opening closed.
5. Cut a muzzle from a single layer of felt and blanket stitch onto Bertie’s face. Embroider the nose and mouth with two strands of black thread. Sew two black micro buttons on for his eyes.
6. Using the two remaining small yellow buttons, sew Bertie’s arms to the front shoulders. Sew the other half of the large popper between Bertie’s shoulder blades on his back.
7. Using the pattern, cut a scarf from red polka dot fabric and tie it around Bertie’s neck.
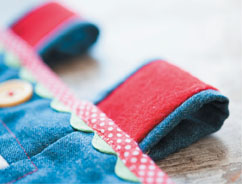
1. The hanging loops have been designed to look like two little chimneys to complete Bertie’s house. Cut two 5cm x 15.5cm (2in x 6in) rectangles from red fabric and two 7.5cm x 15.5cm (3in x 6in) from denim fabric.
2. Place a red and denim rectangle right sides together, match one side seam, and sew down this side. Match the other side seam – the denim will appear too big at this stage – and sew. Turn the right way out – the denim will appear to wrap itself around the red fabric. Press.
3. Fold the chimneys in half denim side facing and sew them to the back of the wall hanging 4cm (1
1
⁄
2
in) from each edge.
4. Take the wooden dowel and thread it through the chimney loops. Your finished wall hanging is now ready to be hung.
