Build Your Own ASP.NET 3.5 Website Using C# & VB (57 page)
Read Build Your Own ASP.NET 3.5 Website Using C# & VB Online
Authors: Cristian Darie,Zak Ruvalcaba,Wyatt Barnett
Tags: #C♯ (Computer program language), #Active server pages, #Programming Languages, #C#, #Web Page Design, #Computers, #Web site development, #internet programming, #General, #C? (Computer program language), #Internet, #Visual BASIC, #Microsoft Visual BASIC, #Application Development, #Microsoft .NET Framework

Speaking SQL
309
For example, imagine that you’
re trying to extract the information shown in Table 8.1
from the Employees table of the Dorknozzle database.
How do we make this kind of data available to our web site? The first step is to learn
how to read this data using SQL. Then, in the next chapter, we’ll learn to access
the data from ASP.NET web applications.
In the following sections, we’ll learn to write queries that will let us view existing
data, insert new data, modify existing data, and delete data. Once you’ve learned
how to write these fundamental SQL queries, the next step is to put everything together, and to build the web forms with which your users will interact. Let’s begin: first up, open SQL Server Management Studio. Visual Web Developer
can also be used to test SQL queries, but SQL Server Management Studio is slightly
easier to use for our purposes. Log in to your SQL Server instance, and select the
Dorknozzle database in the
Object Explorer
pane, as illustrated in Figure 8.1
. Figure 8.1. Using SQL Server Management Studio Express
Having selected the Dorknozzle database, go to
File
>
New
>
Database Engine Query
, or simply click the
New Query
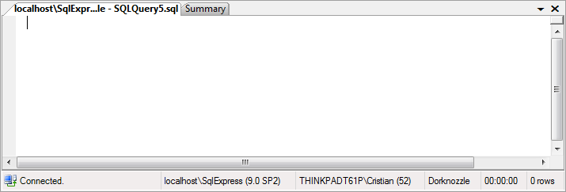
button on the toolbar. A new query window, like the
one shown in
Figure 8.2, should open in the right-hand pane.
Licensed to [email protected]


310
Build Your Own ASP.NET 3.5 Web Site Using C# & VB
Figure 8.2. A new query window
In the query window, type your first command:
FROM Employees
Click the
Execute
button, or press
F5
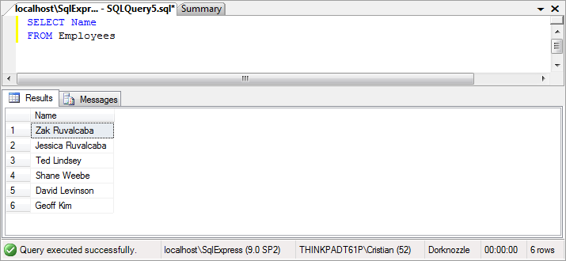
. If everything works as planned, the result will
Figure 8.3. Executing a simple query
Nice work! Now that we’ve taken our first look at SQL, let’s talk more about SQL
queries.
Using the SELECT Statement
The most common of all SQL queries is the SELECT query. This query is generally
constructed using a SELECT clause and a FROM clause. To understand this concept
more clearly, take a look at the following statement, which retrieves all columns of
all records in the Departments table:
Licensed to [email protected]
Speaking SQL
311
SELECT *
In this case, the SELECT clause lists the columns that you want to retrieve. In this
case, we used *, which means “all columns.” The FROM clause specifies the table
from which you want to pull the records. Together, these two clauses create an SQL
statement that extracts all data from the Departments table.
You’ve probably noticed that the two clauses appear on separate lines. If you wanted
to keep the entire statement on one line, that’s fine, but SQL lets you separate the
statements on multiple lines to make complex queries easier to read. Also note that
although SQL is not actually a case-sensitive language, we’ll capitalize the keywords
(such as SELECT and FROM) according to the popular convention.
To sum up, here’s the basic syntax used in a SELECT query:
SELECT
This keyword indicates that we want to retrieve data, rather than modify, add,
or delete data—these activities use the UPDATE, INSERT, and DELETE keywords,
respectively, in place of SELECT.
columns
We must provide the names of one or more columns in the database table from
which we want to retrieve data. We can list multiple columns by separating the
column names with commas, or we can use * to select all columns. We can also
prefix each column name with the table name, as shown here:
SELECT Employees.Name, Employees.Username
This approach is mandatory when two or more of the tables we’re dealing with
contain columns that have the same names. We’ll learn to read data from multiple tables a little later in the chapter.
FROM
The FROM keyword ends the SELECT clause and starts the FROM clause, which
identifies the tables from which the data will be extracted. This clause is required
in all SELECT statements.
Licensed to [email protected]


312
Build Your Own ASP.NET 3.5 Web Site Using C# & VB
tables
We need to identify the names of the tables from which we want to extract data.
To list multiple tables, separate their names with commas. Querying multiple
tables is called a
table join
—we’ll cover this a bit later.
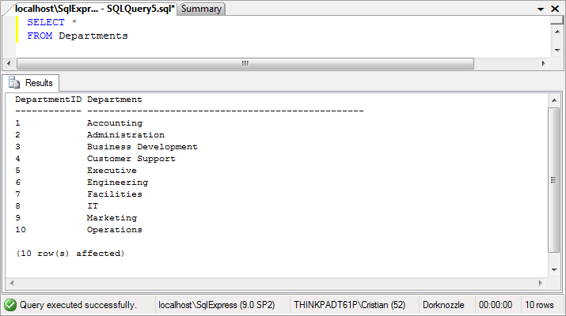
Armed with this knowledge, we can see that the preceding sample statement would
retrieve all records from the Departments table, producing a set of results like that
Figure 8.4. Reading the list of departments
See how easy it is? The SELECT query is probably the one you’ll use most.
Viewing Results in Text Format
By default, the query editor of SQL Server Management Studio displays the results
in a grid like the one shown in Figure 8.3
. As you work with SQL Server, you may start to find this view a little impractical; in particular, it makes viewing longer
strings of text painful because each time you run the query, you need to resize
the columns in the grid. Personally, I prefer the plain text view, which is shown
in
Figure 8.4
. You can enable this mode by selecting
Query
>
Results To
>
Results
To Text
.
Licensed to [email protected]


