Authors: Marisa McClellan
Food in Jars (32 page)

T
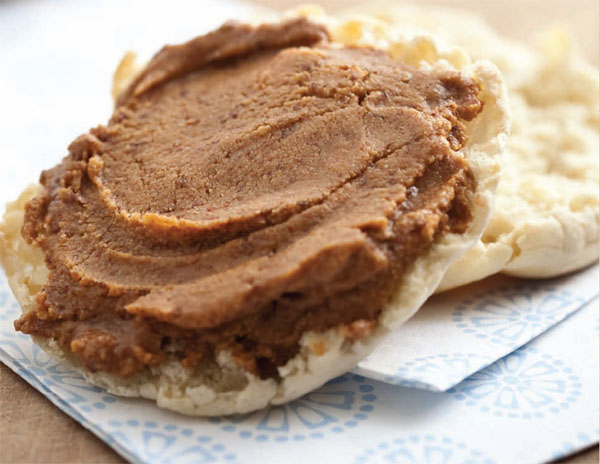
HIS BUTTER COMBINES BOTH ASPECTS OF MY FAVORITE
childhood sandwich in a single spread. In addition to being terrific in all the applications you're used to, I like to take it to potlucks, paired with a platter of crisp apple and pear slices (toss the fruit in a little lemon juice to prevent browning). It's amazing how impressed people are by this slightly sweet, homemade peanut butter.
2 cups/290 g raw peanuts
3 tablespoons honey, divided
3 tablespoons peanut oil, divided
1½ teaspoons sea salt, divided
Preheat oven to 325°F/165°C/gas 3. Line a baking sheet with a silicone baking mat or parchment paper.
Spread the peanuts on the prepared baking sheet. Drizzle with 2 tablespoons honey, toss evenly to coat and roast in the oven until the nuts are golden brown, about 25 to 30 minutes, stirring the peanuts at least twice during baking to ensure even roasting.
Remove the baking sheet from the oven and let the peanuts cool for at least 10 minutes. When they're cool enough to handle, pour the honey-roasted peanuts into the bowl of a food processor. Add 1 tablespoon peanut oil and 1 teaspoon sea salt and begin to run the processor.
As the motor runs and the peanuts break down, drizzle in the remaining 2 tablespoons peanut oil.
Continue to process in 20- to 30-second intervals, stopping the motor and removing the lid after each interval to break up any clumps and scrape down the sides of the processor.
When the contents of the bowl resemble peanut butter, stop the motor, remove the lid, and taste. Add the remaining tablespoon honey and ½ teaspoon salt only if you deem it necessary (the beauty of making your own nut butter is that you can make it just how you like it).
Scrape the peanut butter into a jar and store in the refrigerator. It will keep up to 1 month.

I
HAVE A DEAR FRIEND WHO ADORES ALMOND BUTTER.
For the first decade of our friendship, I didn't quite understand why she raved about it so much. I found it to be sort of stodgy, bitter and unyielding, not nearly as good as my beloved peanut butter. Then I tried making it myself. The butter that came out of my food processor was smooth, rich and entirely delicious. Suddenly, I completely understood her appreciation and was slathering it on toast, bananas, and even the occasional tortilla chip.
2 cups/290 g raw almonds
2 tablespoons real maple syrup
¼ teaspoon sea salt
2 tablespoons walnut oil (or any other complementary neutral oil), divided
Preheat oven to 325°F/165°C/gas 3. Line a rimmed baking sheet with a silicone baking mat or parchment paper.
Spread the almonds on the prepared baking sheet. Drizzle the maple syrup over the almonds and toss the nuts with your fingers so that they get evenly coated. Roast in the oven until the nuts go brown and the maple syrup darkens, about 20 minutes, tossing at least once during baking to ensure even roasting.
Remove the baking sheet from the oven and let the maple-roasted almonds cool for 10 to 15 minutes.
When they're cool enough to handle, pour the maple-roasted nuts into the bowl of a food processor and pulse to begin breaking them up. Add the salt and a drizzle of the walnut oil and run the processor 30 to 45 seconds. Remove the lid and scrape down the sides. Repeat this process-drizzle-scrape procedure until the almonds have broken down into butter. You may not need all the oil; it will depend on the moisture content of the almonds.
Scrape the almond butter into a jar and store in the refrigerator. It will keep up to 1 month.

E
VERYONE HAS A STORY ABOUT THE FIRST TIME
they tasted Nutella. I lost my chocolate and hazelnut-spread innocence when I was in college. As I got older, I didn't lose my taste for it, but I did lose my incredible tolerance for sweets. This version takes all the goodness of that iconic spread and transforms it into something slightly less sugary but no less delicious.
2 cups/270 g hazelnuts
2 teaspoons walnut oil (or any other complementary neutral oil)
3 ounces/85 g dark chocolate, melted
¼ cup/20 g cocoa powder
1 vanilla bean, split and scraped
â
cup/70 g confectioners' sugar
¼ teaspoon sea salt
Preheat oven to 350°F/180°C/gas 4.
Spread the hazelnuts out on the prepared baking sheet. Roast in the oven until the nuts are fragrant, about 10 to 12 minutes, shaking the pan to stir up the nuts at least once during baking to ensure even roasting.
Remove the baking sheet from the oven and pour the nuts into a large, fine-mesh strainer and gently shake it. This helps loosen the skins of the hazelnuts. Alternatively, let the nuts cool for 10 minutes on the baking sheet. When the nuts are cool enough to handle, you can bundle them in a clean kitchen towel and rub vigorously to aid the removal of the skins. They don't all have to be removed, but they can impart a bitter flavor if too many remain.
Pour the nuts into the bowl of a food processor and process until they resemble cornmeal. Add the walnut oil and melted chocolate, and pulse to combine.
Remove the lid, scrape down the sides, and add the remaining ingredients. Pulse to combine and then remove the lid and scrape down the sides of the bowl again. Repeat this process-scrape procedure until your product resembles butter.
Scrape the butter into a jar and store in the refrigerator. It will keep up to 1 month.
MO'S FAMOUS WHOLE GRAIN PANCAKE MIX

J
ARS AREN'T JUST FOR PRESERVES. THEY DO GOOD
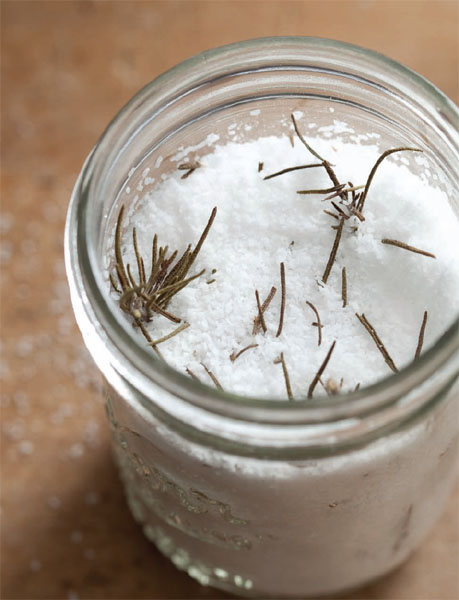
work as receptacles for leftovers, can serve as a to-go mug in a pinch and also make excellent canisters for dry goods, (if you have issues with pantry moths, keeping all your dry goods in jars will greatly reduce their spread). I often take jars with me to grocery stores with bulk sections so that I can avoid using a plastic bag and dispense my oatmeal directly into the jar where it belongs (before filling, make sure to take your jar to the customer service department so that they can weigh it and give you a tare for the jar. That way, you won't have to pay for the weight of the jars in addition to the contents).
One tool that works just as well for general jar filling as it does for canning activities is a wide mouth funnel. It makes getting mixes, grains, and beans into the jars far less messy and frustrating. The best way to pack dry goods into a jar is to fill it halfway, apply the lid, and then gently tap the bottom of the jar with the heel of your hand. This helps settle the contents of the jar to make a bit more space, and it also helps to prevent a mess.
Because I make so much jam, I often give it away to friends and family. On special occasions, I like to pair the jam with a complementary mix to round out the present. Of course, many of those mixes are packaged in jars. Here are a few of my favorites.
