Making Artisan Cheese (16 page)
Read Making Artisan Cheese Online
Authors: Tim Smith

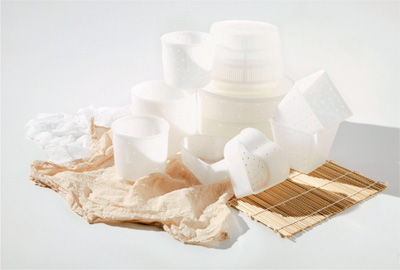
Cheese molds come in many shapes and sizes, and many of them have special shapes that are historically linked to certain types of cheeses.
Cheese Follower
The cheese follower is a thin, flat piece of plastic that rests on top of your cheese. The follower is slightly smaller in diameter than the mold, so that it travels downward in the mold when pressure is applied. By evenly distributing the weight of the press over the surface of the cheese, a follower allows for a symmetrical cheese.
Cloth Banding, Natural Rind, or Waxing
When making aged cheeses, you will need a way to protect the outside of the cheese. There are three typical approaches: natural cloth banding, natural ring, and waxing. Cloth banding is the traditional way that cheeses are preserved. Quite simply, a cloth bandage is wrapped around the cheese, allowing for the formation of a rind.
A natural rind is formed when a cheese is allowed to sit in a ripening room for an extended period of time. The natural evaporation of the moisture from the cheese hardens the exterior, forming an impenetrable crust. When forming natural rinds, it is best to keep the cheeses clean with frequent washings or brushings with a mild brine solution (see
page 86
for directions for making a brine solution).
Waxing is used to keep a cheese from drying out and to prevent mold growth on the exterior of your cheese. Although wax is breathable, it does not allow a full exchange of moisture the way a cloth
band will. On the other hand, if you prefer a cheese that is softer with more moisture, waxing may be the way to go. The procedures for waxing are simple.
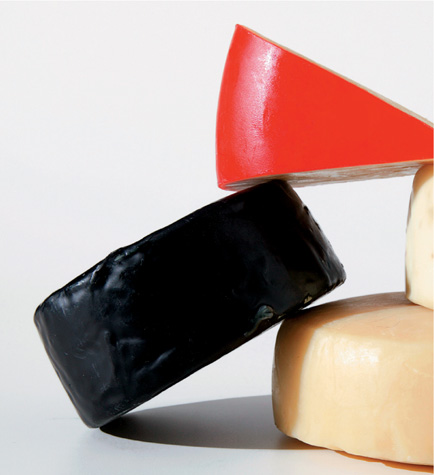
A coating of wax helps cheese retain moisture while excluding mold, and prolongs the storage life of the various cheeses.
Artisan Advice
Although cheese wax is convenient for covering your cheese, it is difficult to clean out of your cooking pot. Why not save yourself the trouble and go to your local thrift shop and purchase a few inexpensive, stainless-steel cooking pots and reserve them for waxing?
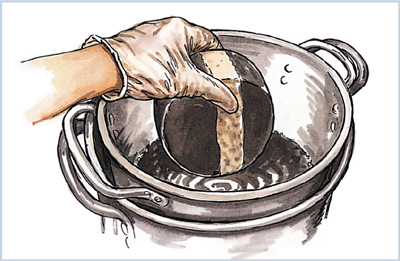
WAXING CHEESE
EQUIPMENT
2 pots (one for your cheese wax, and the second to act as the double boiler) Cheese thermometer Cheese wax
PROCEDURE
1.
Make sure that the cheese is sufficiently dry and cool.
2.
Place the cheese wax in the wax pot, and melt it over a double boiler. Heat the wax to 250°F (121°C) to eliminate any surface bacteria that may have formed on the cheese.
3.
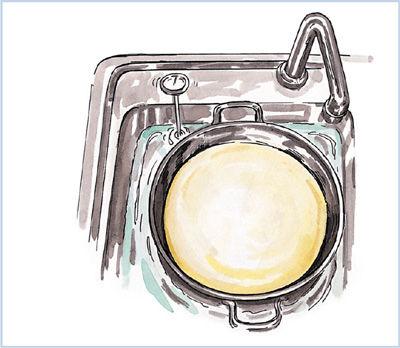
Once the target temperature is reached, hold your cheese by the side and dip one half of it into the wax using a simple in-and-out motion. Let the wax dry and harden, and then dip and coat the other side. (See illustration at right.) Let the wax cool. Check for any spots you may have missed and repeat again, taking care to cover the entire cheese. Two coats are sufficient.
Cheese Trier
This funky little tool is essential for making any of the hard cheeses. As the name implies, the trier is used to sample a section of the cheese without having to cut it open. You simply core out a sample to taste and inspect. Break off a piece close to the center of the cheese, and then plug the cheese with the remainder. The cheese will fill in the small amount that was lost.
Mini Fan
This optional aid will discourage the formation of mold in the refrigerator, and will evenly distribute humidity. Set it in an area away from the cheese, close the door on the cord, and plug it into an outlet.
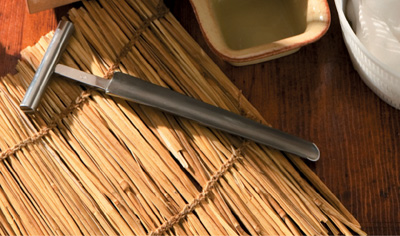
Cheese makers guard their cheese trier as if it were made of precious metal, and for good reason. This simple stainless-steel tool is used to extract a small sample of cheese from the center of the wheel, so that the maker can taste it to judge its ripeness.
Intermediate Cheese-Making Techniques
Culturing the Milk
This is the first stage in the cheese-making process. Also known as acidifying, the procedure entails adding the starter to the milk at the proper temperature and letting the culture grow. It is important that the milk is at the proper temperature and that this temperature is maintained throughout the process. The best way to assure this is to heat the milk in a hot-water bath (the kitchen sink works best). In general, the water needs to be ten degrees higher than your target temperature.
Additives to the Milk
After culturing your milk, it is time to add any of the additives required. Typically these include calcium chloride, annatto coloring, or lipase. When adding these to your milk, they need to be diluted in ¼ cup (60 ml) cool water so that they are distributed evenly throughout the milk. Make sure that you stir the milk for a minute after adding them.
TOOLS
Cooking pan, or double boiler
Cheese thermometer
Stainless-steel stirring spoon
Colander
Cheese cloth
Catch bowl
Cheese press
Curd knife
Cheese board
pH testing strips, or electronic reader
Ripening cave (dedicated refrigerator)
Refrigerator thermostat
Humidistat
Cheese mold
Cheese follower
Cheese wax or butter muslin for banding
Two drying mats
(plastic or bamboo sushi mats)
Ripening box (a plastic food-grade box with
sealing lid, or a large zip-close plastic bag)
Catch pan
Cheese film
8" x 8" (20 x 20 cm) baking pan
Molds
Renneting
No matter what type of rennet you use (dry or liquid), it needs to be diluted for even distribution throughout the milk. Use ¼ cup (60 ml) cool, unchlorinated water. (Read the labels of bottled water to be sure it is unchlorinated.) If you are using rennet tablets, let them sit in the water for forty minutes before use.
The milk must be at the temperature stated in your recipe before adding the rennet. Rennet is effective between 68°F and 122°F (20°C–50°C). When adding the rennet to the milk, gently stir in circles and from top to bottom, for about one minute. If you are using raw milk or non-homogenized milk, you will need to top-stir as well. This method entails using your spoon and stirring the top half of the pot. In these types of milk, the cream rises to the top, and top-stirring assures an even distribution of rennet. Cover and wait the recommended time—in most cases thirty to forty minutes.
Checking for a Clean Break
After you have allowed the rennet to work on the ripened milk, you must check if your curds have reached the right consistency before you cut them. Too soon, and they will be mushy, and will lack the body necessary to successfully make cheese. Too late, and they won’t cut cleanly. The best way to gauge curd development is to look for a clean break. This is done by placing your finger (make sure it’s clean!) into the curds at about a 45 degree angle and pulling upward. If the curds lift, and break around your finger, then the curds are ready to cut. If they do not break, wait a few minutes and try again. Instead of your finger, you can use a knife, but you won’t get the feel of the curds.