Read The New Drawing on the Right Side of the Brain Online
Authors: Betty Edwards
The New Drawing on the Right Side of the Brain (44 page)

BOOK: The New Drawing on the Right Side of the Brain
7.52Mb size Format: txt, pdf, ePub
ads
8. At this point you have the drawing “blocked in.” The rest is all refinement, called “working up” the drawing to a finish. Note that, because the original drawing was done in charcoal and you are working in pencil, the exact roughness of the charcoal medium is difficult to reproduce in pencil. But also, even though you are copying Courbet’s self-portrait, your drawing is your drawing. Your unique line quality and choice of emphasis will differ from Courbet’s.
9. At each step, pull back a little from the drawing, squint your eyes a bit, and move your head from side to side slightly to see if the image is beginning to emerge. Try to see (that is, to image) what you have not yet drawn. Use this emerging, imagined image to add to, change, reinforce what is there in the drawing. You will find yourself shifting back and forth: drawing, imaging, drawing again. Be parsimonious! Provide only enough information to the viewer to allow the correct image to occur in the viewer’s imagined perception. Do not overdraw.
At this point, I hope you will be really seeing, really drawing, really experiencing the joy of drawing. Later, when drawing a person from life, you will find yourself wondering why you never noticed how beautiful the person is, noticing perhaps for the first time the shape of the nose or the expression of the eyes (Figure. 10-10).
10. As you are working up the drawing, try to focus your attention on the original. For any problem that you encounter, the answer is in the original. For example, you will want to achieve the same facial expression: the way to accomplish that is to pay careful attention to the exact shapes of the lights and the shadows. For example, notice the exact angle (relative to vertical or horizontal) of the shadow in the corner of the mouth. Notice the exact curve of the shadow under Courbet’s right eye and the exact shape of that small shadow under the right cheekbone. Try not to talk to yourself about the facial expression.
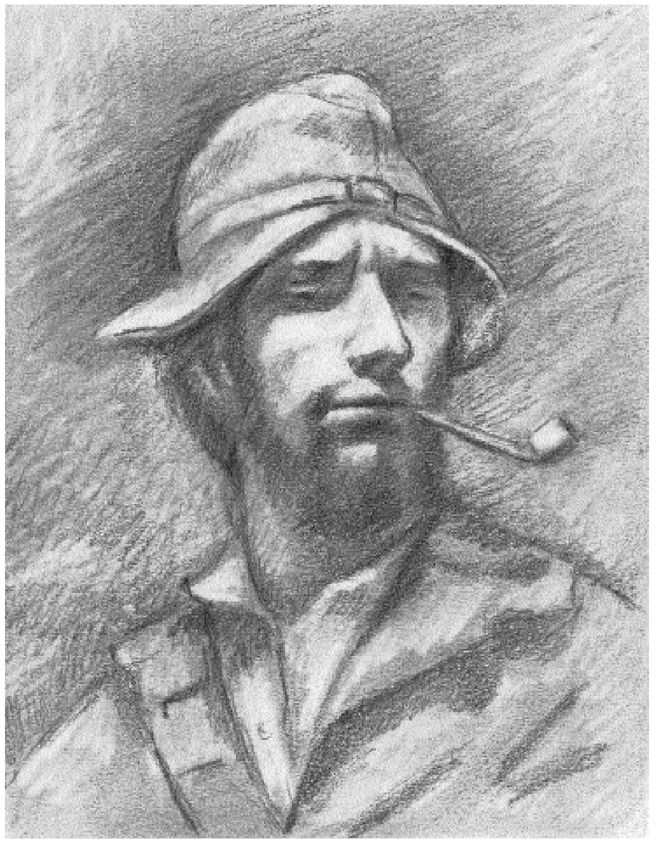
Fig. 10-10. A copy in pencil of Courbet’s
Self-portrait
by instructor Brian Bomeisler.
Self-portrait
by instructor Brian Bomeisler.

Fig. 10-11. Berthe Morisot (1841-1895).
Self-Portrait,
c. 1885. Courtesy of The Art Institute of Chicago.
Self-Portrait,
c. 1885. Courtesy of The Art Institute of Chicago.
11. Draw just what you see, no more, no less. You’ll notice that the whites of the eyes are barely lighter than the dark shadow surrounding the eye. You will be tempted to erase out the whites because, well, you know they are called “whites of the eyes.” Don’t do it! Allow the viewer of your drawing to “play the game” of “seeing” what is not there. Your job is to barely suggest, just as Courbet did.
After you have finished:In drawing the Courbet portrait, you were bound to be impressed by this work, its subtlety and strength, and how the personality and character of Courbet emerge from the shadows. I’m sure that this exercise has provided you with a taste for the power of light/ shadow drawing. An even greater satisfaction, of course, will come from doing your own self-portrait.
Taking the next stepI’m sure you are aware that we have moved from seeing and drawing every detailed edge, as in Pure Contour Drawing, to precisely seeing and drawing negative space, to seeing exact proportional relationships, to accurately seeing and drawing the large and small shapes of lights and shadows. As you continue to draw after completing these lessons, you will begin to find your own unique style of using these fundamental components. Your personal style may evolve into a rapid, vigorous calligraphy (as in the Morisot
Self-Portrait,
Figure 10-11), a beautifully pale, delicate style of drawing, or a strong, dense style. Or your style may become more and more precise, as in the Sheeler drawing, Figure 10-12. Remember, you are always searching for your way of seeing and drawing. No matter how your style evolves, however, you will always be using edges, spaces, relationships, and (usually) lights and shadows, and you will depict the thing itself (the gestalt) in your own way.
In this lesson, we are relying on the skills you’ve developed with the first three components to learn the fourth, lights and shadows, so the viewer can correctly see what you have left out. For this process to work, it is helpful to see the exact shapes of lights and shadows as positive and negative shapes, and to correctly see the angles and proportions of lights and shadows.
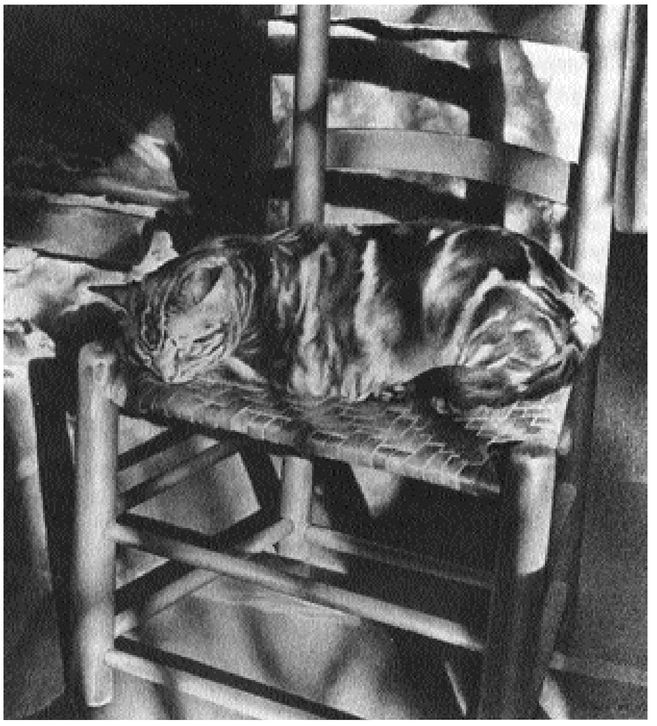
Fig. 10-12. Charles Sheeler (1883-1965),
Feline Felicity,
1934. Conté crayon on white paper. Courtesy of The Fogg Art Museum, Harvard University. Purchase-Louise E. Bettens Fund.
Feline Felicity,
1934. Conté crayon on white paper. Courtesy of The Fogg Art Museum, Harvard University. Purchase-Louise E. Bettens Fund.
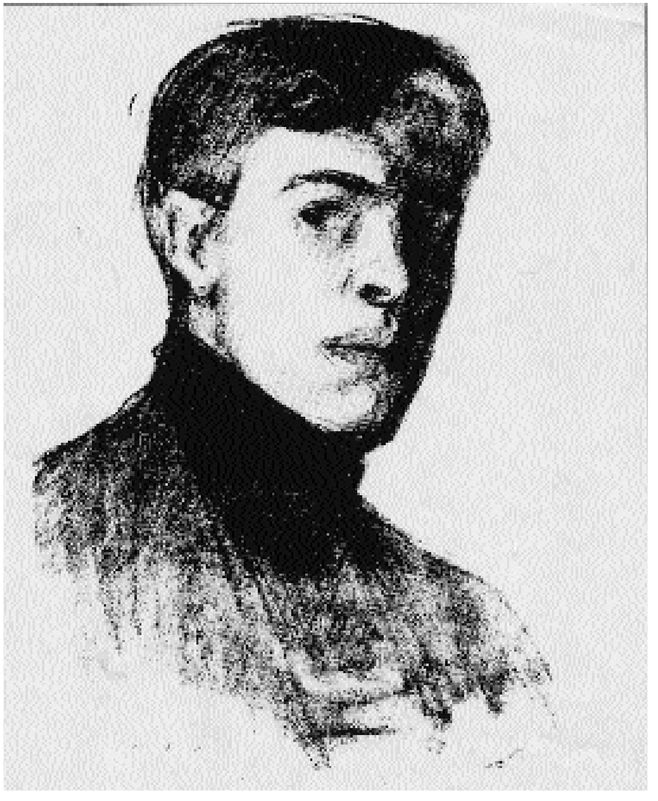
More than the other components, this fourth skill apparently strongly triggers the brain’s ability to envision a complete form from incomplete information. By suggesting a form with light/ shadow shapes, you cause to viewer to see something that is not actually there. And the viewer’s brain apparently always gets it right. If you provide the right clues, your viewers will see marvelous things that you don’t even have to draw! For examples, see the self-portrait by Edward Hopper, Figure 10-13.
The truth is, you can cause yourself to see what is actually not there, and you should strive for this phenomenon. Learning this “trick of the artist” is quite intriguing. As you are drawing, constantly squint you eyes to see if you can yet “see” the form you intend. And when you “see” it—that is, the envisioned image is there—stop! So many times in workshops, watching a beginning student draw, I find myself urgently saying, “Stop! It’s there. You’ve got it. Don’t overwork it!” There is an amusing saying in art circles that every artist needs someone standing right behind with a sledgehammer to let the artist know when the artwork is finished.
Fig. 10-13. Edward Hopper (18821967),
Self-Portrait,
1903. Conté crayon on white paper. Courtesy of the National Portrait Gallery, Smithsonian Institution. The artist shadowed the left side of his head in an almost even tone. Yet the viewer “sees” the eye that is bareley suggested.
Self-Portrait,
1903. Conté crayon on white paper. Courtesy of the National Portrait Gallery, Smithsonian Institution. The artist shadowed the left side of his head in an almost even tone. Yet the viewer “sees” the eye that is bareley suggested.
Before we advance to the next drawing, your self-portrait, I want to show you how to “crosshatch.” This is a technical term for creating a variety of tones or values in a drawing by laying down a sort of “carpet” of pencil strokes, often crossing the strokes at angles. Figure 10-14 is an example of a tonal drawing built almost entirely of crosshatches. I’ll also review the proportions of the head in frontal view and in three-quarter view.
In former years, I thought that crosshatching was a natural activity, not requiring teaching. Apparently, this is not the case. The technique must be taught and must be learned. In fact, I now believe that the ability to crosshatch is a mark of a trained artist. If you glance through this book at the many reproductions, you will see that almost every drawing has some area of hatching. You will also notice that crosshatching has almost as many forms as there are artists to use them. Each artist, it seems, develops a personal style of hatching, almost a “signature,” and, very quickly, so will you.
At this point, I will show you the technique and a few of the traditional styles of hatching. You will need paper and a carefully sharpened pencil.
1. Hold your pencil firmly and make a group of parallel marks, called a “set” (shown in Figure 10-15), by placing the pencil point down firmly, fingers extended. Swing off each mark by moving the whole hand from the wrist. The wrist remains stationary and the fingers pull the pencil back just a bit for each successive hatch. When you have finished one “set” of eight to ten hatch marks, move your hand and wrist to a new position and hatch a new set. Try swinging the mark toward you, and also try swinging it away from you in an outward movement to see which seems more natural for you. Try changing the angle of the marks.
2. Practice making sets until you have found the direction, spacing, and length of marks that seem right for you.
3. The next step is to make the “cross” sets. In classical hatching, the cross set is made at an angle only slightly different from the original set, as shown in Figure 10-16. This slight angle produces a very pretty moiré pattern that causes a drawing to seem to shimmer with light and air. Try this. Figure 10-17 shows how to use crosshatching to create a three-dimensional form.

Fig. 10-14.
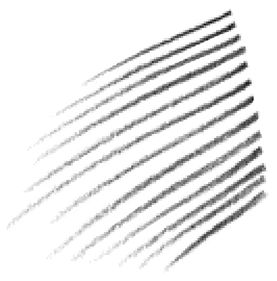
Fig. 10-15.
BOOK: The New Drawing on the Right Side of the Brain
7.52Mb size Format: txt, pdf, ePub
ads
Other books
The Tower by Adrian Howell
The Glass Wall (Return of the Ancients Book 1) by Madison Adler, Carmen Caine
Ellie's Song by Lisa Page
Children of Eden by Joey Graceffa
News of the World: A Novel by Paulette Jiles
Identity Thief by JP Bloch
Cut by Layla Harding
Screwed by Eoin Colfer
Farewell to Freedom by Sara Blaedel