Ukulele For Dummies (35 page)
Read Ukulele For Dummies Online
Authors: Alistair Wood

 Third fret
=
Ring (third finger)
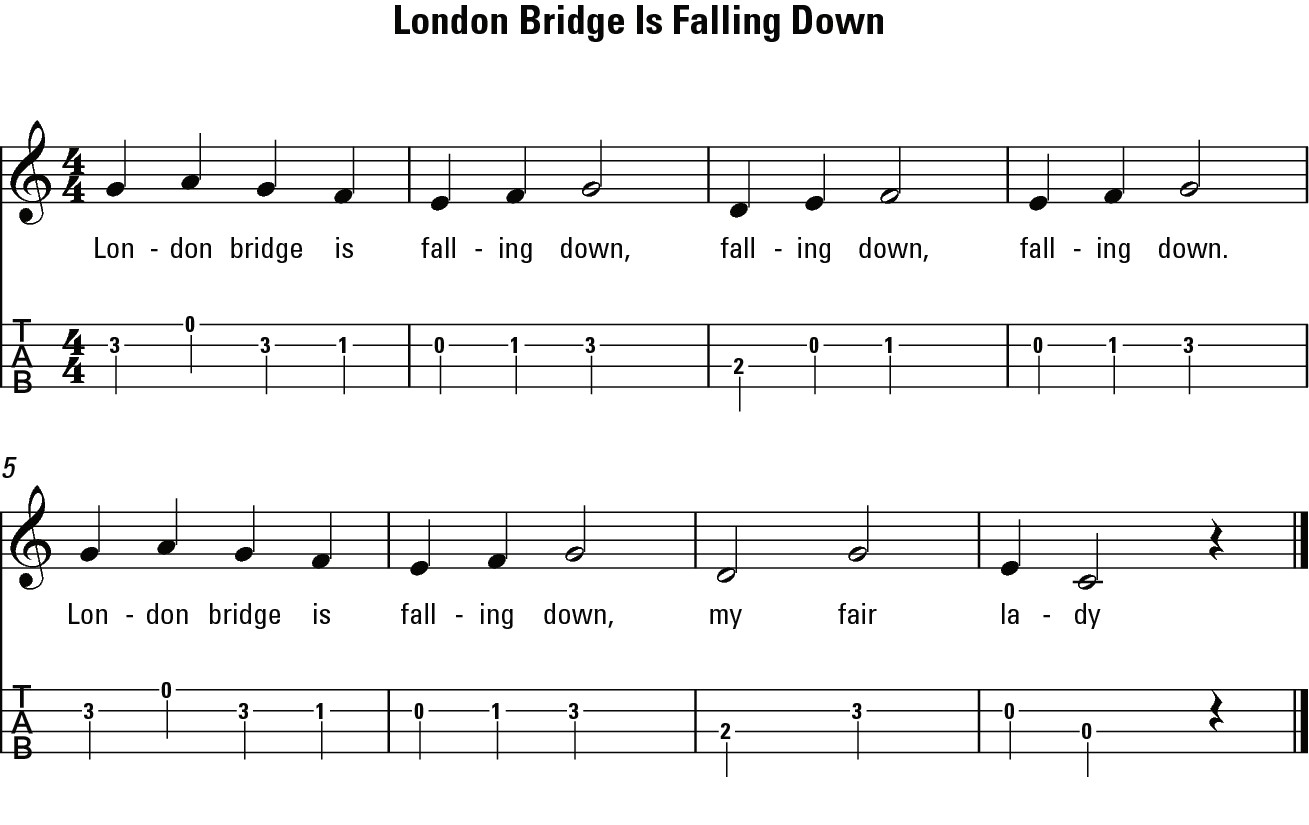
Figure 7-23:
âLondon Bridge Is Falling Down' in standard notation and tab.
Moving up the neck
Now I show you how to play a slightly more difficult piece that involves playing up the neck. You can easily get lost when you play up there and so familiarise yourself with the fret markers first. Most ukuleles have fret markers at the fifth and seventh frets. Traditionally, ukuleles also have a marker at the ninth fret, although some have adopted the guitar system of having this higher mark at the tenth fret.
 Figure 7-24 shows the melody line of âI'll Fly Away' (the chord part for this tune is in Chapter 4 and it's Track 25). The lowest fret you play here is the seventh, and so anywhere you see a note at the seventh fret use your index finger to fret it. Use your middle finger for notes at the eighth fret and your little finger to fret the tenth fret.
The little finger is the most neglected (perhaps that's why he went wee, wee, wee all the way home) and can feel very awkward when you start trying to use it. But putting in some practice with it is well worthwhile because this little finger can come in very handy.
Shifting positions
So far in this section, the tunes have had one finger allocated to a single fret throughout. Many tunes, however, require you to shift your hand position during the tune so you can cover more than four frets.
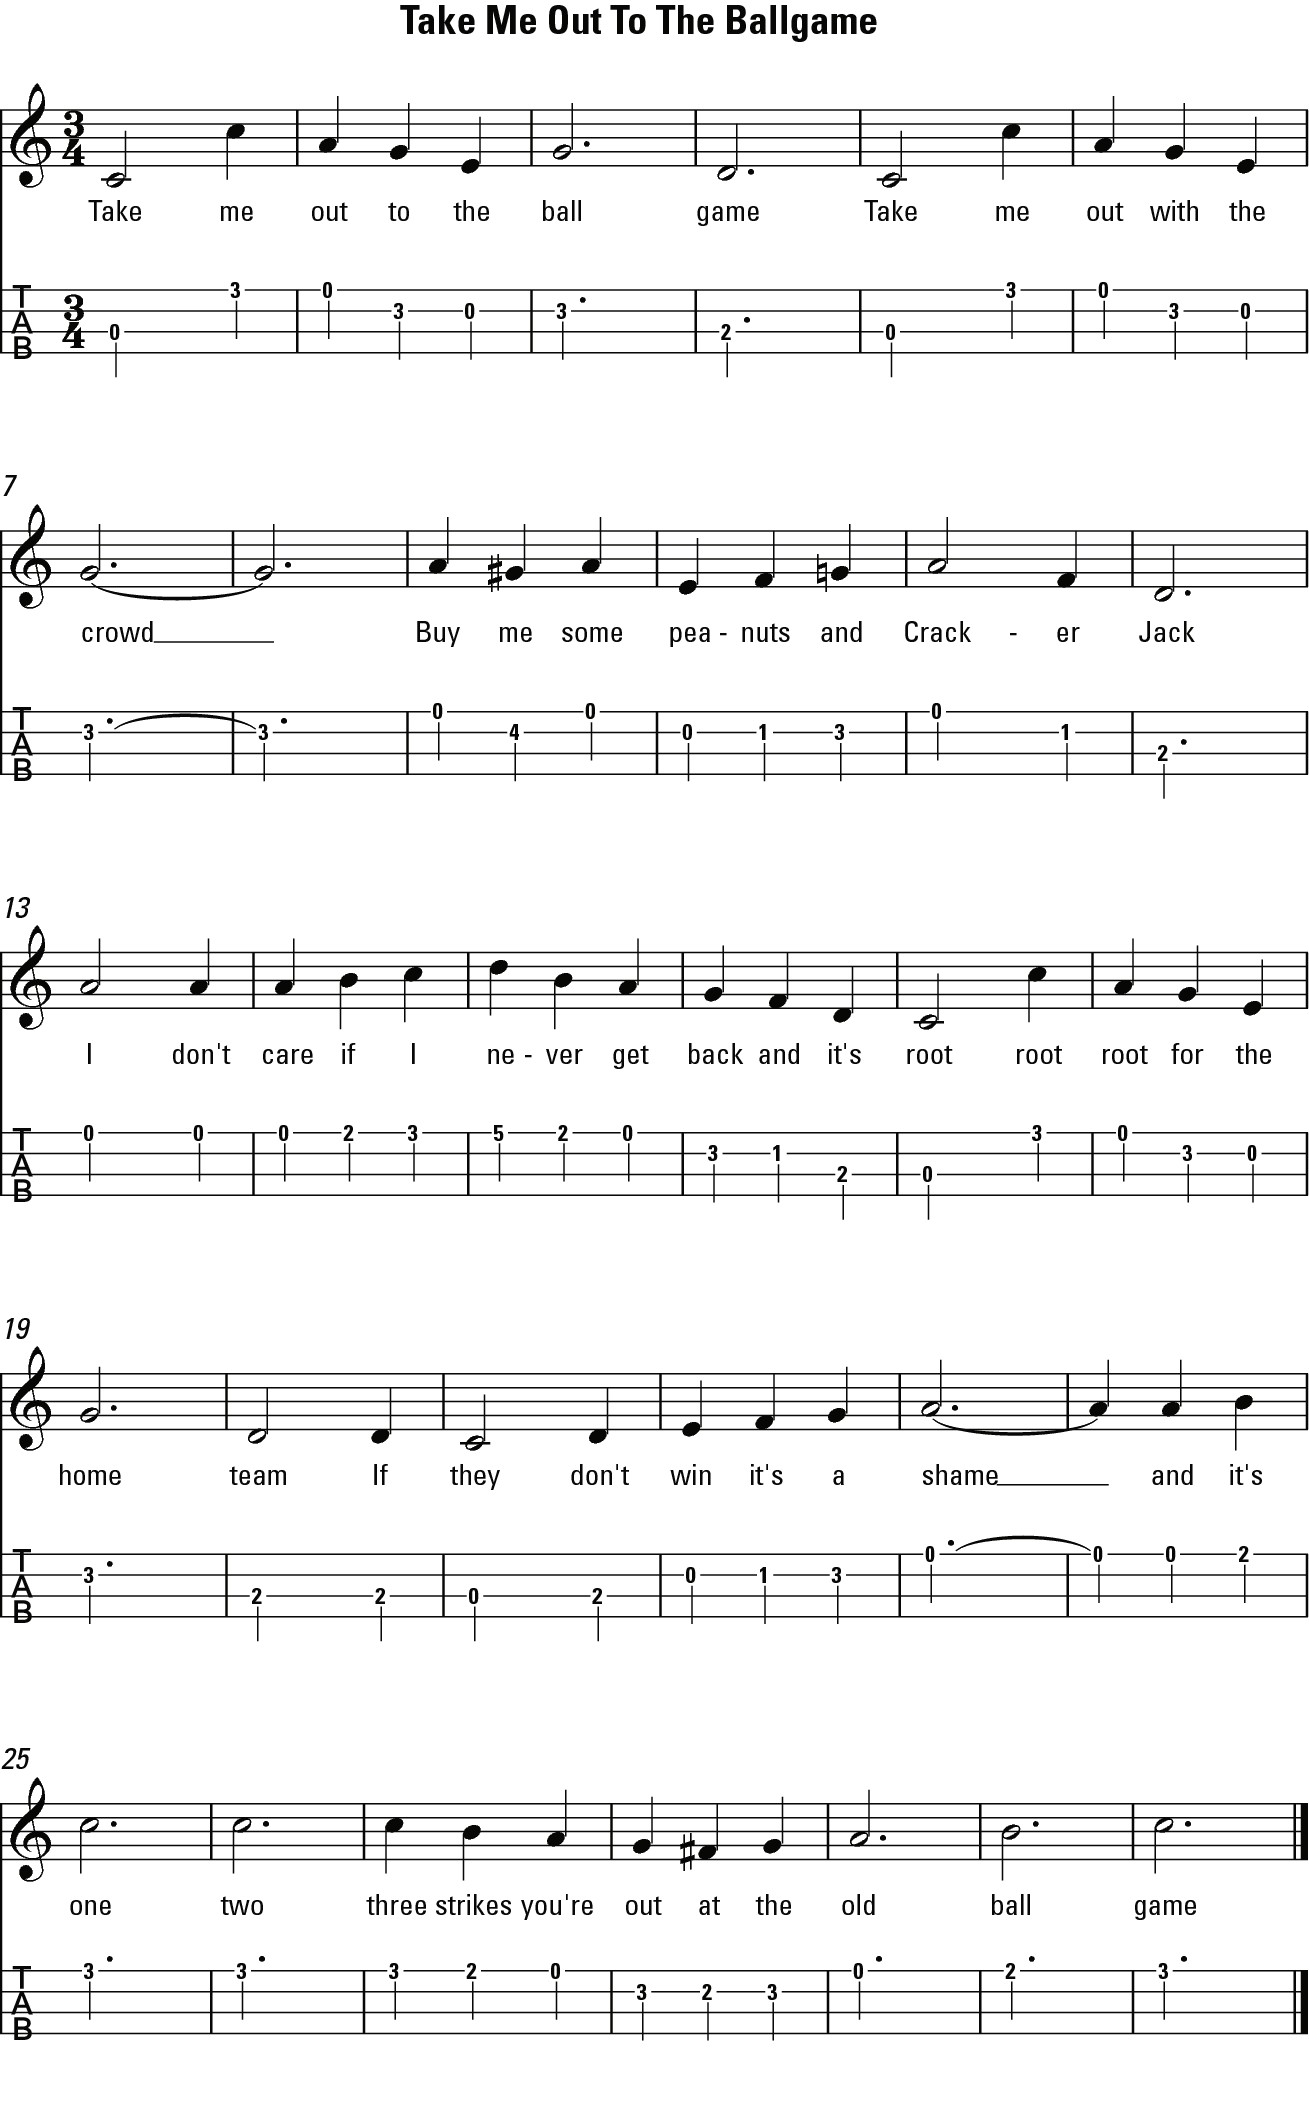
âTake Me Out to the Ballgame' (see Figure 7-25 and listen to Track 26) requires the smallest shift that exists: one fret. In order to reach the fifth fret, you need to move your whole hand up a fret so that you're playing the second fret with your index finger and the third fret with your middle finger and so on.
 Wherever you can, shift position when an open string is used, because this approach gives you time to move and makes for a smoother transition. So for this tune, move up a fret at the start of bar 14 and back down again at the end of bar 15.
Figure 7-24:
âI'll Fly Away' in standard notation and tab.
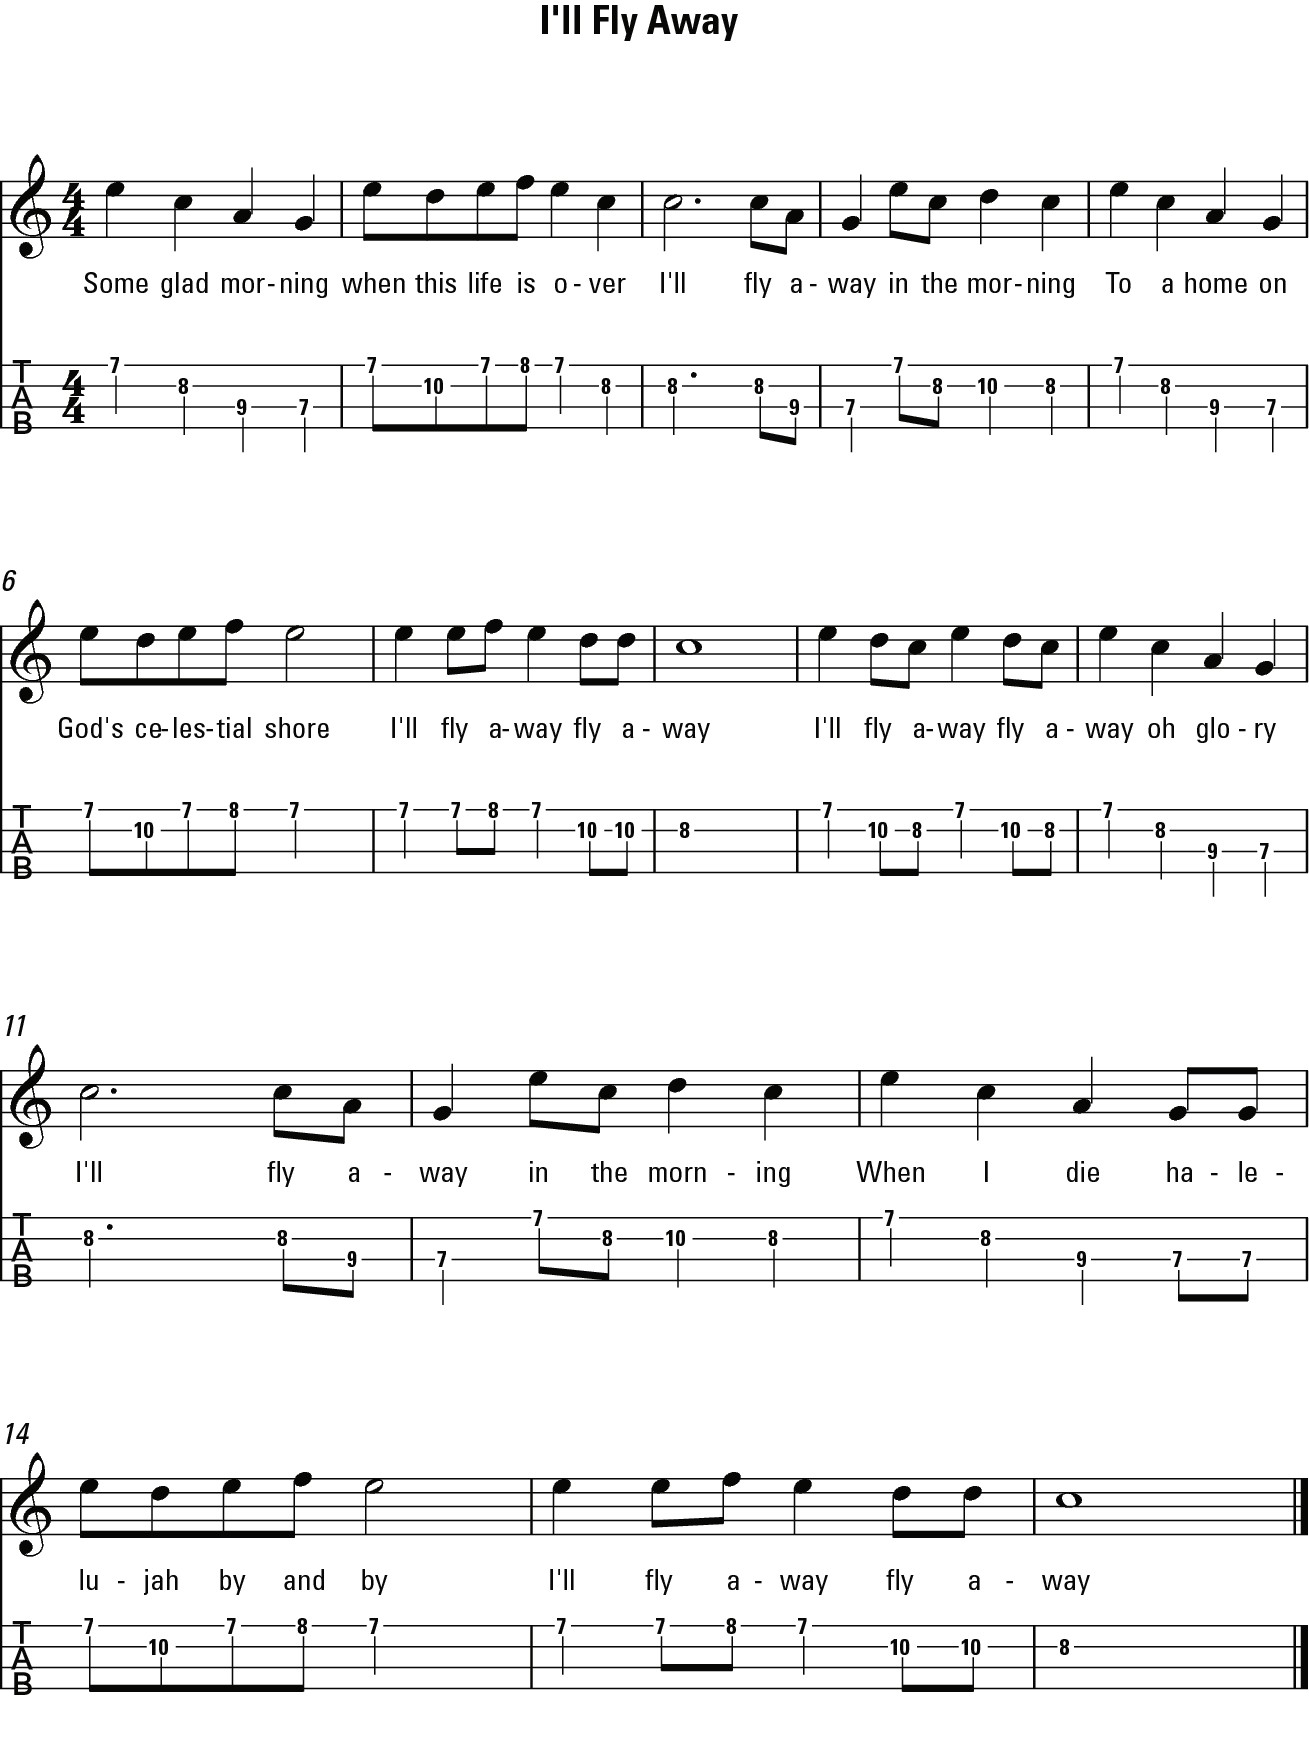
Figure 7-25:
âTake Me Out to the Ballgame' in standard notation and tab.
Chapter 8
Discovering Fingerpicking Patterns
In This Chapter
![]() Unpicking the picking technique
Unpicking the picking technique
![]() Hand-picking some patterns to accompany your playing
Hand-picking some patterns to accompany your playing
P
eople usually think of the ukulele as a strumming instrument. Players have, however, picked out single notes with the strumming hand right from the ukulele's beginnings â and even before that. Notation for the machete (the precursor of the ukulele) suggests that musicians played it by fingerpicking (check out Chapter 1 for more on the uke's history).
Since then, ambitious players have used the fingerpicking technique to unlock new melodies and textures on the ukulele. When used as accompaniment the ukulele can create a delicate, shimmering sound that's particularly familiar from much Hawaiian music (Israel Kamakawiwoâole was a master), but is also used by modern players such as Stephin Merritt of Magnetic Fields.
As well as being used as an accompaniment, fingerpicking transforms the ukulele into a solo instrument. The technique can be used together with strums or alone to play both melody and accompaniment at the same time.
This chapter shows you the basics of fingerpicking on the ukulele.
Introducing the Fingerpicking Technique
When fingerpicking, instead of strumming your fingers along the strings, you pluck them individually. For the early exercises in this chapter, each of the fingers of your picking hand (the right if you're right-handed) is allocated to an individual string (see Figure 8-1):
Thumb â G-string
Index finger â C-string
Middle finger â E-string
Ring finger â A-string
Figure 8-1:
Picking hand photo.

Curl your fingers around so that they're slightly underneath the string, with the string running over the fingertip.
Try to keep your hand as relaxed as possible.
You can do one of two things with your little finger. Proper technique dictates that you lift it up off the body, which allows you to switch quickly between picking and strumming and means that you're not dampening the soundboard of the ukulele at all. You can, however, use your little finger to anchor your hand to the fretboard, which gives your picking hand much more stability.
A downside of this position, however, is that your little finger tends to fall into that position naturally. Because I hold my little finger like this so often when playing, it can drop into that position when not playing: chugging a beer with your little finger delicately raised in the air provokes a comment or two, I can tell you!
You pluck the string by curling your finger further round to slightly lift then release the string. This action doesn't need much force. If you pluck too hard, the string may vibrate against the frets (which causes buzzing).
In order to illustrate fingerpicking in tablature, letters are used (I describe tab in detail in Chapter 7). The fingers of the picking hand are referred to as follows:
T = Thumb
I = Index/pointer finger
M = Middle finger
A = Ring finger