Vegan Yum Yum (20 page)

step 5
Spray them thoroughly with the cooking oil spray and bake for 30 minutes, or until tender. Remove and let cool with the tomatoes and zucchini.
step 6
While the vegetables are baking, prepare the eggplant crème. Cut the ends off of the eggplants and remove the skin. Cube the eggplants and place them on a large dish on top of three paper towels (you'll probably need to do this in batches). Microwave the eggplant on high for about 8 minutes, until it is soft and the paper towels have absorbed most of the moisture. (This will prevent the eggplant from absorbing so much oil while cooking.)
step 7
Heat a seasoned wok or nonstick pan with 2 tablespoons of olive oil. Add the eggplant and sauté for 5 to 10 minutes over medium-high heat until very soft and browned. Add the eggplant to the work bowl of a food processor fitted with a steel blade. Add the salt, cashews, herbs, and the garlic (if using) and process for several minutes until very smooth; it should be the consistency of creamy hummus. Season to taste, if needed, and then place the eggplant crème in a piping bag or a 1-quart plastic bag with one of the corners cut off.
step 8
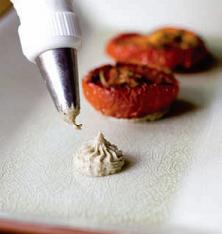
To assemble, put a little dot of eggplant crème on the plate where you want the napoleon to be. This will act as an anchor (or the tastiest glue in the world).
step 9
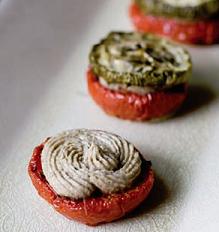
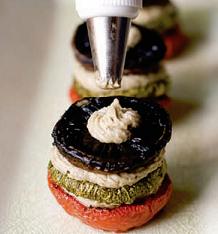
Place a tomato on top of the anchor and pipe more eggplant crème on the top. Not too much!
step 10
Add a slice of zucchini, then another layer of eggplant crème. Top with an upside-down mushroom cap and place a dab of eggplant crème where the stem was.
step 11
For garnish, add a small piece of roasted tomato and a basil-leaf crown. Put a thin layer of olive oil in the bottom of the dish, surrounding the napoleons. Drizzle balsamic vinegar into the oil, and you'll create pretty, contrasting dots. Serve warm or at room temperature.
Onigiri
O
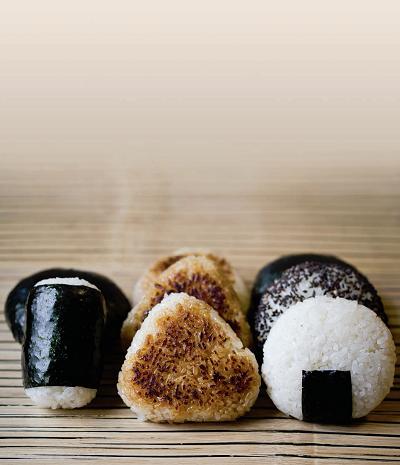
nigiri, or rice balls, are a popular Japanese snack or light meal. They're great for picnics or packed lunches, and they're easily customizable. They require few ingredients and aren't difficult to make, but it may take a few tries to get used to shaping them. The rice is usually shaped with bare hands, which can be uncomfortable (since the rice needs to be hot!) and quite messy if you're not careful. The method given below uses moistened plastic wrap and greatly reduces the mess and difficulty of shaping. If you live near a Japanese market, you can find inexpensive plastic shaping molds there.
Onigiri are traditionally filled with umeboshi, also called pickled plums. They not only provide a burst of flavor, but they are also used to prevent the rice from spoiling in packed lunches on hot summer days. I don't really like umeboshi myself, but you may wish to include one in the center of your onigiri. You can fill them with anything you wish, although salty and sour things are traditional. One of my testers suggested spinach sautéed with garlic and sugar, which is another popular filling for rice balls in Japan; it's neither sour nor salty, but it's definitely tasty!
Extra Supplies for Your Shaping Station
Rice cooker (optional)
Large bowl for rice
Small, 1-cup capacity bowl for shaping
Plastic wrap
Small bowl of salted ice water
Scissors
Tinfoil and cookie sheet
for broiling, or skillet
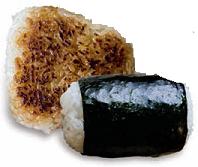
Onigiri
Makes 8 pieces
step 1
Cook the rice and let it steam for 5 to10 minutes before opening the rice cooker or removing the lid of your pot. Add the rice to a large bowl and coat it with the sushi or rice vinegar to taste (you won't need more than ¼ cup for every 2 dry cups of prepared rice). Shape the hot rice as desired (see directions below).
Shaping the Onigiri:
step 1
Get organized. You want to have everything you need ready before the rice is finished cooking. Prepare a clear work surface for shaping the onigiri. Have a plate covered in plastic wrap, lightly coated in oil, on which to place your finished onigiri.
step 2
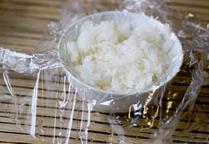
Line the shaping bowl with plastic wrap. Wet the plastic wrap with some cool, salty water, sprinkling it in with your fingers. Dump out the extra water.
step 3
Using a spoon, loosely fill the bowl with rice. If you're using fillings, fill the bowl halfway, lightly pack the rice, add the filling in the center, then top with more rice and proceed.
Ingredients
Rice:
2 cups dry sushi rice
(short-grain rice, or glutenous)
*
3 to 4 tablespoons sushi vinegar or regular rice vinegar
*
Note: Be sure to use the amount of water recommended on the rice package. As a general rule of thumb, short-grain rice cooks best with a 1:1.25 rice-to-water ratio.
Fillings and Flavorings (all optional):
Miso
Other pickled items
Sautéed spinach, flavored with garlic and sugar
Soy sauce
(for grilled/broiled/fried yaki onigiri)
Umeboshi
Wrappings and Decorations:
Nori sheets, dried
Black sesame seeds
step 4
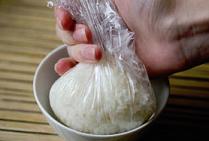
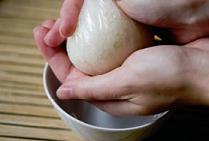
Scoop the rice up in the plastic wrap and begin to compress it. Follow the directions below for the shape you desire to make.
Making the Triangle Onigiri:
step 1
Begin forming the rice into a triangle shape, starting with a point at the top. The rice will bulge out the front at first.
step 2
Flatten the front and continue shaping your triangle. The points should be rounded, and the front and back should be flat. Continue shaping until it's about 95 percent done.
step 3
Wet your hands thoroughly with the salty water to prevent the rice from sticking to you. Remove the triangle from the plastic wrap. Put the finishing touches on the shape, being careful not to press too hard so as not to break it.
step 4
Place shaped rice aside on lightly oiled plastic wrap while you finish shaping the rest of the rice. You can create all sorts of shapes using this method.
