Build Your Own ASP.NET 3.5 Website Using C# & VB (95 page)
Read Build Your Own ASP.NET 3.5 Website Using C# & VB Online
Authors: Cristian Darie,Zak Ruvalcaba,Wyatt Barnett
Tags: #C♯ (Computer program language), #Active server pages, #Programming Languages, #C#, #Web Page Design, #Computers, #Web site development, #internet programming, #General, #C? (Computer program language), #Internet, #Visual BASIC, #Microsoft Visual BASIC, #Application Development, #Microsoft .NET Framework

combination of these.
Windows Live ID authentication
The newest addition to user authentication methods,
Windows Live ID authen-
tication
(also known as
Passport authentication
) is a centralized authentication service provided by Microsoft. It allows users to sign in to multiple web sites
Licensed to [email protected]
554
Build Your Own ASP.NET 3.5 Web Site Using C# & VB
using Windows Live accounts, which are associated with the users’ email addresses. Developers who use this authentication method don’t need to worry about storing credential information on their own servers.
When users log in to a site that has Windows Live ID authentication enabled,
they are redirected to the Windows Live ID web site, which prompts them for
their email addresses and passwords. After the information is validated, the
users are automatically redirected back to the original site.
This method sounds good, but it has one major downside: it requires users to
have a Windows Live account in order to use your site, and it ties your application to Microsoft’s proprietary system. We’ll spend the rest of this chapter exploring forms authentication—the most popular authentication method supported by ASP.NET.
Working with Forms Authentication
By far the most popular authentication method, forms authentication is extremely
flexible. With forms authentication, you get to choose where the usernames and
passwords are stored: in the
Web.config
file, in a separate XML file, in a database,
or in any combination of the three.
Forms authentication is cookie-based—each user’s login is maintained with a
cookie. A browser may not access protected pages of the site unless it has a cookie
that corresponds to the successful authentication of an authorized user.
You’ll most frequently use three classes from the System.Web.Security namespace
as you work with forms authentication:
FormsAuthentication
contains several methods for working with forms authentication
FormsAuthenticationTicket
represents the
authentication ticket
that’s stored in the user’s cookie
FormsIdentity
represents the authenticated user’s identity
Let’s walk through an example that explains how a basic Login page is constructed.
Licensed to [email protected]
Security and User Authentication
555
Adding a Login Page to Dorknozzle
In this chapter, we talk about security and the final goal is to establish in the site a
number of secure zones that can be accessed only by certain users. We start by
adding a Login page to Dorknozzle. Whenever an anonymous user tries to access
those secured zones, he or she will be redirected to this Login page. In the following
few pages, we will:
1. Configure the authentication mode for the application within the
Web.config
file.
2. Configure the authorization section to allow or deny certain users within the
Web.config
file.
3. Create the Login page that your visitors use.
The first step is to configure the authentication mode for the application.
To do so, we must edit the application configuration file,
Web.config
. Open this file
in Visual Web Developer and add the
code snippet. Visual Web Developer may already have created an
tag for you with the default mode of Windows—in this case, just change the value to
Forms:
DorkNozzle\VB\01_web.config
(excerpt)
⋮
⋮
The mode attribute has four possible values: Forms, Windows, Passport, and None.
Since we’re working with forms authentication, we set the mode to Forms.
Next, set up the authorization scheme by adding the
Licensed to [email protected]
556
Build Your Own ASP.NET 3.5 Web Site Using C# & VB
DorkNozzle\VB\02_web.config
(excerpt)
As you’ll see in more detail in the next few sections, the question mark symbol (?)
represents all anonymous users—that is, users who have not logged in. Essentially,
this configuration reads: “Deny all non-logged-in users.” If a user tries to access a
page controlled by this
Web.config
file without logging in, he or she will be redirected to the Login page. Unfortunately, this has the side-effect of denying all unauthenticated users access to our style sheet and image files as well. Thankfully, ASP.NET
provides a way to override
Web.config
settings for particular directories of your web
site—the
To allow anonymous users access to your
App_Themes
and
Images
folders, add the
following to
Web.config
:
DorkNozzle\VB\03_web.config
(excerpt)
⋮
Licensed to [email protected]


Security and User Authentication
557
Now, all you need do is create that Login page.
Create a new page named
Login.aspx
, which uses a code-behind file, and is based
on the
Dorknozzle.master
master page. Then, modify its title and content placeholders
like this:
DorkNozzle\VB\04_Login.aspx
<%@ Page Language="VB" MasterPageFile="~/DorkNozzle.master"
AutoEventWireup="false" CodeFile="Login.aspx.vb"
Inherits="Login" Title="
Dorknozzle Login
" %>
Runat="Server">
ContentPlaceHolderID="ContentPlaceHolder1" Runat="Server">
Login
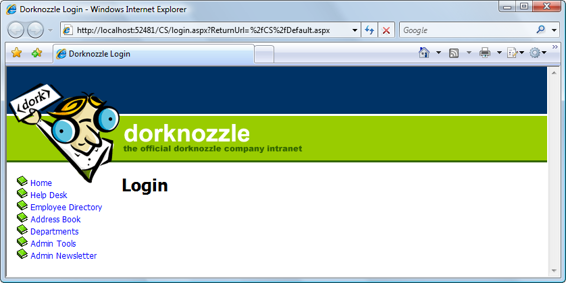
If you execute the project now, you’ll notice that no matter which link you click,
you’ll be redirected to the blank Login page shown in
Figure 13.1
.
Naming the Login Page
How did ASP.NET know that our login form was named
Login.aspx
? We didn’t
specify the name anywhere. By default, unless you specify another form name,
ASP.NET will assume that the Login page is called
Login.aspx
.
Authenticating Users
You’re secured! Anonymous users can’t see your application’s pages, and are
automatically redirected to the Login page. Now what? How can you create users,
give them privileges, store their settings, and so on? Well, it depends.
All versions of ASP.NET can store user account data, and details of the resources
each user can access, in the
Web.config
file. However, relying only on the
Web.config
file isn’t particularly helpful when the users’ account settings need to be easily
configurable: you can’t keep modifying the configuration file to register new users,
modify user passwords, and so on.
Licensed to [email protected]

558
Build Your Own ASP.NET 3.5 Web Site Using C# & VB
Figure 13.1. The Login page
As you probably already suspect, a real user management solution must use the
database somehow. Storing authentication and authorization data—such as user
accounts, roles, and privileges—in the database gives you much greater flexibility
in the long run.
A third solution is to store the user data in the code-behind file. This solution should
never, ever
be used in
any
application, but it will make things easier for us as we work through the first few examples.
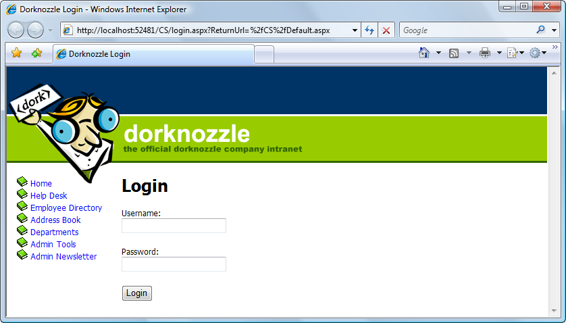
To start off, let’s update our login form by adding a TextBox into which the user
can enter a username, another TextBox for the password, and a Button for submitting
the data to the server. Add this code after the Login heading in
Login.aspx
:
DorkNozzle\VB\05_Login.aspx
(excerpt)
Login
Username:
Password:
Licensed to [email protected]
Security and User Authentication
559
As you can see, the page contains two TextBox controls, one of which has the
TextMode set to Password, which means that an asterisk will display for each character that a user types into this field. The other is a Button control, the OnClick attribute for which calls the LoginUser method. Next, we’ll add the server-side script for this method, which will validate the login credentials. Add the following code
to your code-behind file:
Visual Basic
DorkNozzle\VB\06_Login.aspx.vb
Partial Class Login
Inherits System.Web.UI.Page
Sub LoginUser(ByVal s As Object, ByVal e As EventArgs)
If (username.Text = "username" And _
password.Text = "password") Then
FormsAuthentication.RedirectFromLoginPage(username.Text, False)
End If
End Sub
End Class
C#
DorkNozzle\CS\06_Login.aspx.cs
public partial class Login : System.Web.UI.Page
{
protected void Page_Load(object sender, EventArgs e)
{
}
protected void LoginUser(Object s, EventArgs e)
{
if (username.Text == "username" &&
password.Text == "password")
{
FormsAuthentication.RedirectFromLoginPage(username.Text,
false);
}
}
}
Licensed to [email protected]
