Building Web Sites All-in-One For Dummies® (109 page)
Read Building Web Sites All-in-One For Dummies® Online
Authors: Claudia Snell

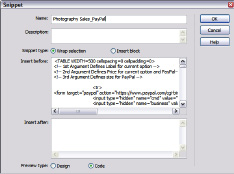
Figure 2-25:
We hereby christen thee,
Joe Snippet
.
2.
Choose Window
â
Snippets.
The Snippets panel opens.
3.
Navigate to the folder that contains the Snippet you want to use.
4.
Drag the desired Snippet onto the page.
You can do this in any mode. If you decide to add a Snippet while working in Code mode, make sure you position your cursor in the proper place. Otherwise, you run the risk of messing up the page. Of course, you can always undo inserting the Snippet.
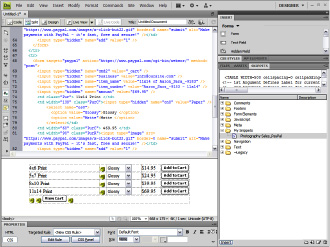
Figure 2-26 shows a page in Split mode where the PayPal Buy Now Snippet was added to a page. The only thing that you'll need to change is the PayPal item number, but that's a small price to pay for not having to enter all that code.
The Snippets panel is a powerful feature that can save you lots of time. In addition to recording your own Snippets, you'll find several useful preset Snippets neatly tucked away in folders. If you don't like JavaScript because of all the code work, check out the JavaScript folder in the Snippets panel. When you start using some of these gems, your clients will think you're a genius. Don't let on that you got by with a little help from a friend.
 To edit a Snippet, select it and then click the Edit Snippet button at the bottom of the Snippets panel. This opens the Snippet dialog box. Edit the code as needed and then click OK to save the edited Snippet.
Figure 2-26:
Instant Snippets. Just add water.
Taking advantage of your assets
Everything's got assets, including the Web pages you design. Whenever you define a site and begin creating pages, the images, colors, Flash movies, hyperlinks, and so on are saved in the Assets panel. Whenever you want to use an Asset on a new page, all you need to do is grab it by the scruff of the neck and drop it on the page. What could be simpler? And if you really, really like an Asset and think you'll use it on other pages for the site you're creating, you can save it as a favorite. To use Assets, follow these instructions:
1.
Choose Window
â
Assets.
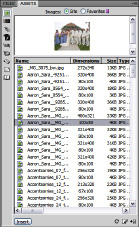
The Assets panel opens. The panel has several icons on the left side, which, when clicked, display all the Assets in the categories. When you click an item such as an image, the image is displayed in the window at the top of the Assets panel. (See Figure 2-27.)
2.
Select the desired Asset and drag it onto the page.
To use an Asset on any Web site, select the Asset and then click the Add to Favorites icon. To access the favorites for a Web site, click the Favorites icon to reveal the site favorites for that category.
Figure 2-27:
Hot, roasted Assets; click an icon to get your hot, roasted Assets.
Using the Dreamweaver Library
The Dreamweaver Library is a wonderful thing. Anything you add to the Library can be used on any page you create within the site. The really cool thing about Library items is that when you edit them, you have the option of updating the pages that already contain the Library item, which is a perfect solution if you have a copyright or anything else that's date sensitive and needs to be updated in multiple pages.
Creating Library items
Consider creating a Library item anytime you have an object that will be used in multiple Web pages. The beauty of a Library item is that you can use it on any Web page in any Web site. To create a Library item, follow these steps:
1.
Open the Web page that contains the item you want to convert into a Library item.
We include a copyright notice on most of the Web sites we create. When we finish creating the home page, we add the copyright notice to the bottom of the page and then convert it to a Library item.
2.
Choose Window
â
Assets and then click the Library icon (that looks like an open book).
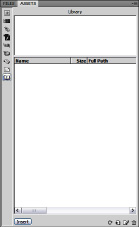
The Assets panel opens to the Library section. (See Figure 2-28.)
Figure 2-28:
The Dream-weaver Library has no librarian.
3.
Select the item you want to convert to a Library item.
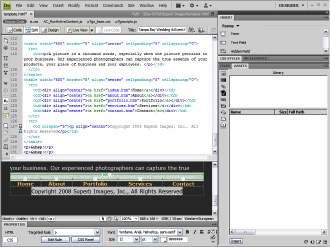
When you select an item, such as a menu with links â or in this case, a copyright notice with HTML tags â it helps to view the page in Split mode. This ensures that you select the object and the tags that format the object. In the case of the copyright notice, we also want to include the tags that center the text and format it as paragraph text. (See Figure 2-29.)
4.
Drag the item from the Web page into the Library when working in Design view.
Alternatively, you can click the New Library Item icon. The item appears in the Library as Untitled.
_fmt.jpeg) If you add an item to the Library that's formatted with a CSS, a warning dialog box appears telling you the item might not look the same on other pages because the CSS formatting information is not copied with the item. In the case of text, the formatting defaults to the HTML formatting for the text object.
If you add an item to the Library that's formatted with a CSS, a warning dialog box appears telling you the item might not look the same on other pages because the CSS formatting information is not copied with the item. In the case of text, the formatting defaults to the HTML formatting for the text object.
Figure 2-29:
This code is going to the Library.
5.
Enter a name for the item.
We use a descriptive name that's easy to decipher when using the item in another Web page. For example, if you're managing multiple Web sites and each one has a copyright notice, precede the copyright notice with the client's name. Figure 2-30 shows a copyright notice as it appears in the Library.
Using Library items
If you set up your Library items when you create the first page of a site, you can easily add it to other pages in the site. To add a Library item to a Web page you're editing, follow these steps:
1.
Position your cursor where you want the Library item to appear.
 If the page includes a lot of formatting tags or code specific to items on the page, view the page in Split mode to ensure that the Library item is placed in the correct position.
2.
Choose Window
â
Assets and then click the Library icon.