Read iOS Programming: The Big Nerd Ranch Guide, 3/e (Big Nerd Ranch Guides) Online
Authors: Aaron Hillegass,Joe Conway
Tags: #COM051370, #Big Nerd Ranch Guides, #iPhone / iPad Programming
iOS Programming: The Big Nerd Ranch Guide, 3/e (Big Nerd Ranch Guides) (40 page)

To change the order of rows in a
UITableView
, you will use another method from the
UITableViewDataSource
protocol –
tableView:moveRowAtIndexPath:toIndexPath:
.
To delete a row, you had to send the message
deleteRowsAtIndexPaths:withRowAnimation:
to the
UITableView
to confirm the deletion. Moving a row, however, doesn’t require confirmation; the table view moves the row on its own authority and reports the move to its the data source by sending the message
tableView:moveRowAtIndexPath:toIndexPath:
. You just have to catch this message to update your data source to match the new order.
But before we can implement the data source method, we need to give the
BNRItemStore
a method to change the order of
BNRItem
s in its
allItems
array. In
BNRItemStore.h
, declare this method.
toIndex:(int)to;
Implement this method in
BNRItemStore.m
.
toIndex:(int)to
{
if (from == to) {
return;
}
// Get pointer to object being moved so we can re-insert it
BNRItem *p = [allItems objectAtIndex:from];
// Remove p from array
[allItems removeObjectAtIndex:from];
// Insert p in array at new location
[allItems insertObject:p atIndex:to];
}
In
ItemsViewController.m
, implement
tableView:moveRowAtIndexPath:toIndexPath:
to update the store.
moveRowAtIndexPath:(NSIndexPath *)sourceIndexPath
toIndexPath:(NSIndexPath *)destinationIndexPath
{
[[BNRItemStore sharedStore] moveItemAtIndex:[sourceIndexPath row]
toIndex:[destinationIndexPath row]];
}
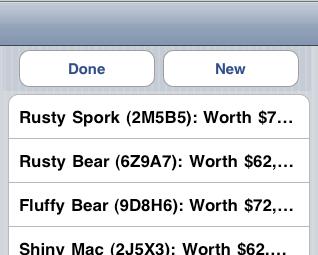
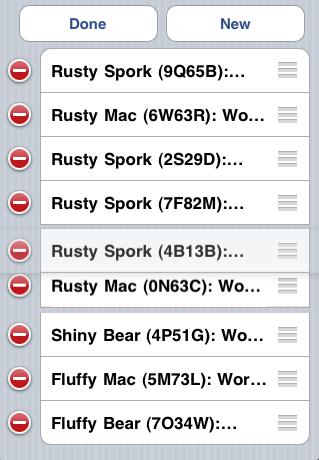
Build and run your application. Check out the new reordering controls (the three horizontal lines) on the side of each row. Touch and hold a reordering control and move the row to a new position (
Figure 10.8
).
Figure 10.8 Moving a row
Note that simply implementing
tableView:moveRowAtIndexPath:toIndexPath:
caused the reordering controls to appear. This is because Objective-C is a very smart language. The
UITableView
can ask its data source at runtime whether it implements
tableView:moveRowAtIndexPath:toIndexPath:
. If it does, the table view says,
“
Good, you can handle moving rows. I’ll add the re-ordering controls.
”
If not, it says,
“
You bum. If you are too lazy to implement that method, I’m not putting controls there.
”
When deleting a row, a confirmation button appears labeled
Delete
. Change the label of this button to
Remove
.
Make it so the table view always shows a final row that says
No more items!
. (This part is the same as a challenge from the last chapter. If you’ve already done it, great!) Then make it so that this row can’t be moved.
After completing the silver challenge, you may notice that even though you can’t move the
No more items!
row itself, you can still drag other rows underneath it. Make it so that no matter what, the
No more items!
row can never be knocked out of the last position.
UINavigationController
In
Chapter 7
, you learned about
UITabBarController
and how it allows a user to access different screens. A tab bar controller is great when you have screens that don’t rely on each other, but what if you want to move between related screens?
For example, the
Settings
application has multiple related screens of information: a list of settings (like
Sounds
), a detailed page for each setting, and a selection page for each detail. This type of interface is called a
drill-down interface
.
In this chapter, you will use
UINavigationController
to add a drill-down interface to
Homepwner
that lets the user view and edit the details of a
BNRItem
. (
Figure 11.1
).
Figure 11.1 Homepwner with UINavigationController

When your application presents multiple screens of information,
UINavigationController
maintains a stack of those screens. Each screen is the
view
of a
UIViewController
, and the stack is an array of view controllers. When a
UIViewController
is on top of the stack, its
view
is visible.
When you initialize an instance of
UINavigationController
, you give it one
UIViewController
. This
UIViewController
is the navigation controller’s
root view controller
. The root view controller is always on the bottom of the stack. More view controllers can be pushed on top of the
UINavigationController
’s stack while the application is running. This ability to add to the stack at runtime is missing from
UITabBarController
, which gets all of its view controllers when it is initialized. With a navigation controller, only the root view controller is guaranteed to always be in the stack.
When a
UIViewController
is pushed onto the stack, its
view
slides onto the screen from the right. When the stack is popped, the top view controller is removed from the stack, and the view of the one below it slides onto the screen from the left.
Figure 11.2
shows a navigation controller with two view controllers: a root view controller and an additional view controller above it at the top of the stack. The
view
of the additional view controller is what the user sees because that view controller is at the top of the stack.
Figure 11.2 UINavigationController’s stack
Like
UITabBarController
,
UINavigationController
has a
viewControllers
array. The root view controller is the first object in the array. As more view controllers and pushed onto the stack, they are added to the end of this array. Thus, the last view controller in the array is the top of the stack.
UINavigationController
’s
topViewController
property keeps a pointer to the top of the stack.
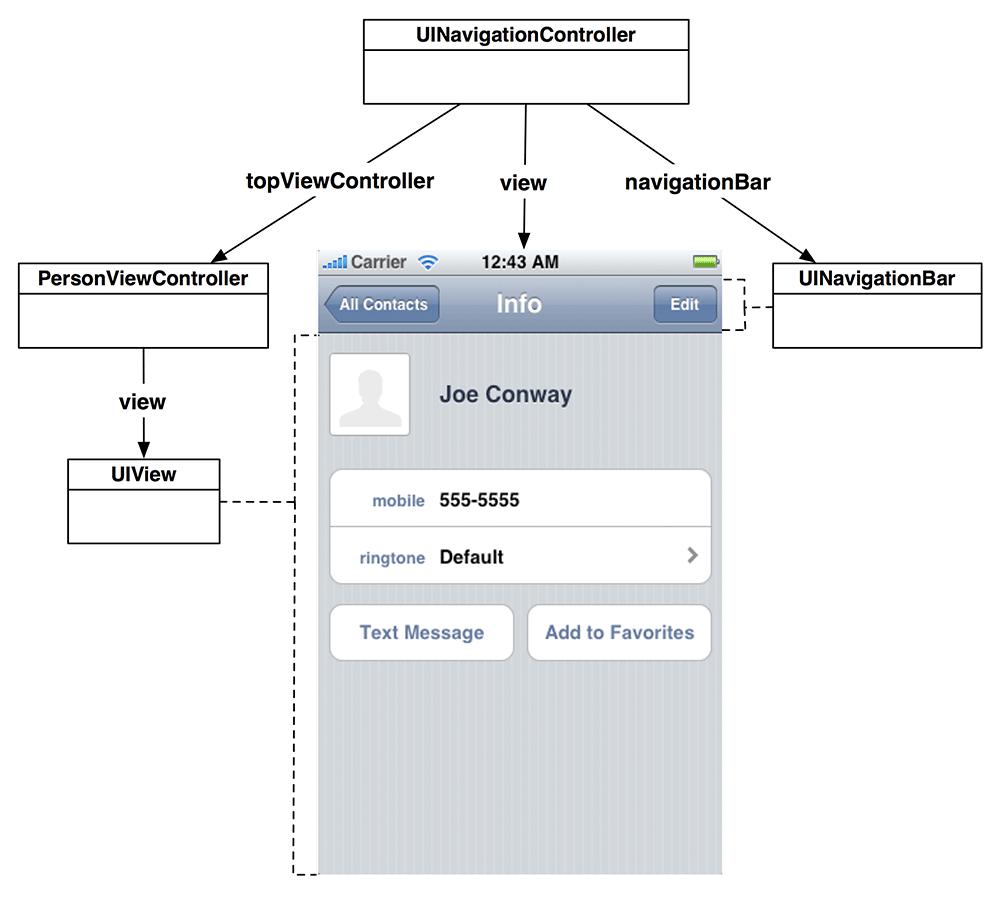
UINavigationController
is a subclass of
UIViewController
, so it has a
view
of its own. Its
view
always has two subviews: a
UINavigationBar
and the
view
of
topViewController
(
Figure 11.3
). You can install a navigation controller as the
rootViewController
controller of the window to insert its
view
as a subview of the window.
Figure 11.3 A UINavigationController’s view
In this chapter, you will add a
UINavigationController
to the
Homepwner
application and make the
ItemsViewController
the
UINavigationController
’s
rootViewController
. Then, you will create another subclass of
UIViewController
that can be pushed onto the
UINavigationController
’s stack. When a user selects one of the rows, the new
UIViewController
’s view will slide onto the screen. This view controller will allow the user to view and edit the properties of the selected
BNRItem
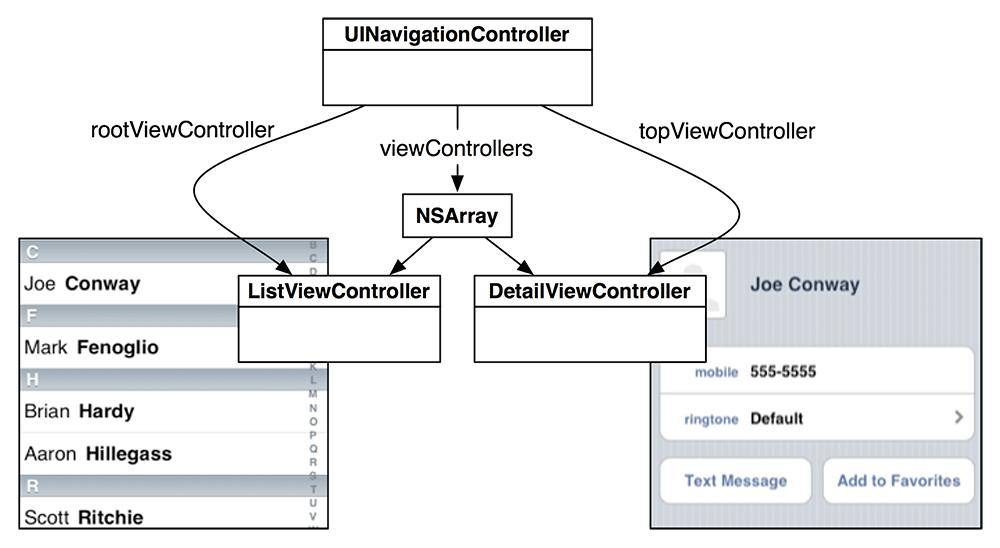
. The object diagram for the updated
Homepwner
application is shown in
Figure 11.4
.
Figure 11.4 Homepwner object diagram

This application is getting fairly large, as you can see in the massive object diagram. Fortunately, view controllers and
UINavigationController
know how to deal with this type of complicated object diagram. When writing iOS applications, it is important to treat each
UIViewController
as its own little world. The stuff that has already been implemented in Cocoa Touch will do the heavy lifting.
Now let’s give
Homepwner
a navigation controller. Reopen the
Homepwner
project and then open
HomepwnerAppDelegate.m
. The only requirements for using a
UINavigationController
are that you give it a root view controller and add its
view
to the window.
In
application:didFinishLaunchingWithOptions:
, create the
UINavigationController
, give it a root view controller of its own, and set the
UINavigationController
as the root view controller of the window.
didFinishLaunchingWithOptions:(NSDictionary *)launchOptions
{
self.window = [[UIWindow alloc] initWithFrame:[[UIScreen mainScreen] bounds]];
// Override point for customization after application launch.
ItemsViewController *itemsViewController = [[ItemsViewController alloc] init];
// Create an instance of a UINavigationController
// its stack contains only itemsViewController
UINavigationController *navController = [[UINavigationController alloc]
initWithRootViewController:itemsViewController];
[[self window] setRootViewController:navController];
self.window.backgroundColor = [UIColor whiteColor];
[self.window makeKeyAndVisible];
return YES;
}
Build and run the application.
Homepwner
will look the same as it did before – except now it has a
UINavigationBar
at the top of the screen (
Figure 11.5
). Notice how
ItemsViewController
’s
view
was resized to fit the screen with a navigation bar.
UINavigationController
did this for you.
Figure 11.5 Homepwner with an empty navigation bar