The Complete Beginners Guide to Mac OS X El Capitan (12 page)
Read The Complete Beginners Guide to Mac OS X El Capitan Online
Authors: Scott La Counte

Clicking on the Search bar in the top right-hand corner will pull up trending searches in case you are looking for what’s hot. If you are looking for a specific song or movie, type it into the Search bar and iTunes will load it for you. Scroll through the main page and the latest releases will be shown front and center, letting you see new music at a glance.
On the right side of the screen you will see Music in big letters, with All Genres under it. Clicking the All Genres link opens a dropdown menu with every main genre you can think of.
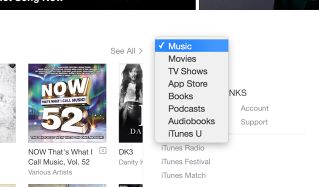
The big Music link will open a dropdown menu with the rest of the iTunes store options: Movies, TV shows, App Store, Books, Podcasts, Audiobooks, and iTunes U. Go through each one and you will see that they all follow the same conventions as the Music page, with charts, top downloads, and new releases.
To purchase new music (or any other media) that interests you, use either the search bar or browse through the categories to find what you’re looking for. When you reach a song or album you’d like, click it to bring up the full information menu for that item.
The window will display all types of information including album price, individual song price, track list, audio previews, release date, ratings, reviews, and similar items. To buy the album (or a single song), click on the price; a prompt window will come up to make sure you really wanted to buy that album, and you can continue by clicking the blue Buy button.
If you already have funds in your iTunes account, or have a card on file, the purchase will be made and the song(s) will begin to automatically download. If you don’t have any money in the account, or haven’t yet added a payment method, you will be asked to enter that information before the purchase can be made.
After your purchases are fully downloaded, you’ll be able to enjoy your new music by clicking on the My Music tab and selecting your latest addition.
App Store
The App Store is where you’ll be able to download and install many different applications that have been developed specifically for use with a Mac computer. These apps will do everything from add new functionalities and make your life easier, to providing a fun way to waste time and play some games during downtime at work. Keep in mind that for the App Store to be functional, you need to be connected to the Internet.
To be clear, Apps purchased on the App Store
only
run on Macs; if you have two Macs, you can download it on both if you have the same account. But you cannot download them on your iPhone or iPad. So if you are wondering why a game you downloaded on the iPhone or iPad is not available free on your Mac, that’s why. Mac Apps are developed using an entirely different framework.
Open the App Store by selecting it either through the dock or Launchpad. The App Store’s home page will greet you, showing you the latest and greatest in the world of apps.
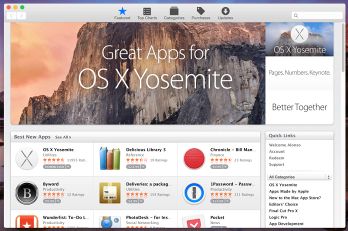
At the top you will see different sections: Featured, Top Charts, Categories, Purchases, and Updates.
The Featured, Top Charts, and Categories tabs will show you apps that can be downloaded, but organized in different ways. Featured will show you Best New Apps, Best New Games, Editor’s Choices, and collections of different apps that work great together.
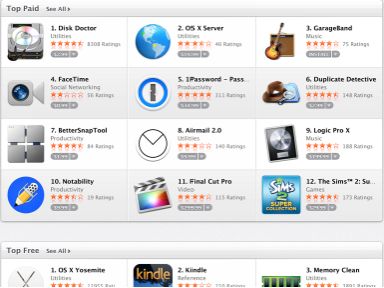
Top Charts shows you the best of the best when it comes to available apps, and is broken down by Top Paid, Top Free, and Top Grossing. On the right side, you can also browse through Top Apps broken down by category, in case you wanted to refine your search.
Categories further breaks down your app hunting into different categories like Business, Education, Reference, Productivity, Medical, Entertainment, and Games.
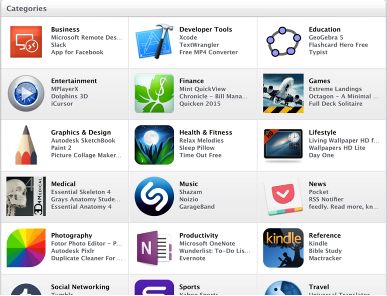
Choosing a category will bring up more selections and the right side will be filled with even more categories. For example, selecting the Business category will bring you to the main Business apps page where the hottest apps are listed. On the right side, smaller categories like Apps for Writers, App Development, or Apps for Designers can be selected. It doesn’t matter what category of apps you are currently under; the list remains the same in the right half.
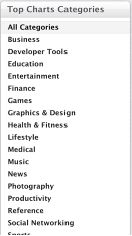
Purchases and Updates are where you can go to view past App Store downloads. The Purchases title can be a bit misleading, because your free apps will also appear here. In the Updates section, you can view which apps need to be updated to the latest version. If you have multiple apps that need updating, you can choose the Update All button and it will go down the entire list.
Lesser Used Apps
There are a lot of apps on Mac that you probably see but don’t use. Here’s a rundown of some of those apps and when you might use them.
TextEdit is Apple’s answer to Microsoft’s Notepad. This is a simple plain text editor. It’s certainly not fancy, but it’s good for jotting down notes.
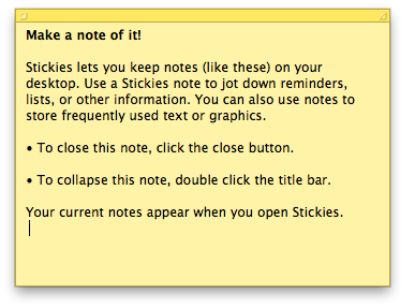
Stickies is a love it or hate it sort of app. If you’re in the love it camp, though, they’re still there. Stickies are like Post-it notes for your desktop. Just open the Stickies app from Launchpad and start sticking away!
Family Sharing
Before finishing this section, I want to talk about one last feature that’s not part of El Capitan—it’s part of Apple products in general. It’s called Family Sharing. With Family Sharing, you can set up one account for everyone in your house, but everyone has separate user names. This means if someone buys a movie, song, app, etc, then everyone in your family plan can access it. But don’t think you can share this with your friends…well you could, but it’s not recommended because whenever they buy something, your credit card is charged—it also would break the terms and conditions you are agreeing to.
To enable Family Sharing, go to System Preferences > iCloud. Then, click Set Up Family Sharing to get started. The person who initiates Family Sharing for a family is known as the family organizer. It's an important role, since every purchase made by other family members will be made using the family organizer's credit card!
Invite your family members to join Family Sharing by entering their Apple IDs. As a parent, you can create Apple IDs for your children with parental consent. When you create a new child Apple ID, it is automatically added to Family Sharing.
There are two types of accounts in Family Sharing: adult and child. As you'd expect, child accounts have more potential restrictions than adult accounts do. Of special interest is the Ask to Buy option! This prevents younger family members from running up the family organizer's credit card bill by requiring parental authorization for purchases. The family organizer can also designate other adults in the family as capable of authorizing purchases on children's devices.
Part 2: Making the Mac Yours
So now you know the basics; you should be able to work your way around the desktop with ease and use all the basic programs comfortably. But it still doesn’t feel quite…you. It still has all the default settings, colors, gestures, and backgrounds. Sure it’s a cool computer, but now let’s make it feel like your computer.
System Preferences
All of the main settings are accessed in System Preferences which is essentially the Mac equivalent of Control Panel on a Windows computer. So to get started, let’s get to System Preferences by clicking Launchpad, then clicking the System Preferences icon.
