Viva Vegan!: 200 Authentic and Fabulous Recipes for Latin Food Lovers (19 page)
Read Viva Vegan!: 200 Authentic and Fabulous Recipes for Latin Food Lovers Online
Authors: Terry Hope Romero

BOOK: Viva Vegan!: 200 Authentic and Fabulous Recipes for Latin Food Lovers
11.59Mb size Format: txt, pdf, ePub
1. If you’re shredding the cabbage—and lots of it—yourself, the best possible tool to use is a mandoline grater (a good-quality one works best and will keep those fingers safe!). Second best is a large food processor fitted with the shredding blade, but it’s entirely possible to also thinly slice cabbage with a sharp heavy chef’s knife and a cutting board. Slice the cabbage in half, remove and discard the core, slice the cabbage into chunks that can fit on your mandoline or into your food processor, and shred it all up. If you have any remaining odd-shaped pieces, chop them into fine shreds with a knife.
2. Combine the shredded cabbage and remaining ingredients in a large bowl and toss well to coat everything with the salt and vinegar. Stuff the
curdito
into a very large resealable plastic bag, at least 1 gallon or more. Press out all of the air and tightly seal the bag. From here you can either seal it into another bag, place on a shelf in the fridge, and place a heavy object on top, or place the bag in a large bowl, place a few heavy cans or a big bag of rice on top of the slaw, and transfer to the refrigerator. Chill for at least 1 hour or overnight; the longer the cabbage chills, the more tender and juicy it will become. To serve, lift up a handful of slaw and gently shake off any excess juices.
•
Serves 4 as a side or starter•
Time: About 30 minutes•
Soy Free
Not traditionally Peruvian, this salad makes good use of all the Latin American favorites: corn, tomatoes, and lima beans, plus a gentle spicy kick from
ají panca
paste. Serve on a bed of baby spinach or arugula for worthy potluck fare or weeknight dinner. Canned or dried limas are often called “butter beans”—don’t fear this un-vegan-sounding name; they are creamy and substantial. Look for canned organic limas, as they often have much less salt and taste sweeter and cleaner than nonorganic brands.
Tip:
Ají panca
is a chile popular in Peru and Bolivia. Like
ají amarillo
, it’s often used in paste form.
Ají panca
has a brick red color with a mild heat level and complex notes of wood, smoke, and blackberries. See Ingredients for substitution suggestions.
Ají panca
is a chile popular in Peru and Bolivia. Like
ají amarillo
, it’s often used in paste form.
Ají panca
has a brick red color with a mild heat level and complex notes of wood, smoke, and blackberries. See Ingredients for substitution suggestions.
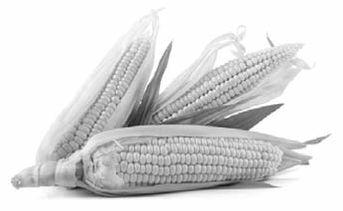
2 cups fresh or frozen corn kernels,
preferably white corn
1½ cups cooked white lima beans; if using
canned, drain and rinse well
½ pound cherry tomatoes,
sliced in half
1 small red onion, diced finely
3 tablespoons finely chopped fresh
cilantro
3 tablespoons lime juice
2 tablespoons
ají panca
paste
2 tablespoons good-quality olive oil
½ teaspoon agave syrup
1 teaspoon dried oregano
½ teaspoon salt, or more to taste
Freshly cracked pepper
1. In a 2-quart saucepan, bring 4 cups of water to a rolling boil. Stir in the corn kernels and cook for 2 to 3 minutes, or until the corn is cooked just enough so that it’s no longer starchy but still crunchy. Drain the corn in a colander set over the sink and rinse with cold water to stop the cooking process. Shake the corn to rid it of excess water or let drain for 10 minutes. You may also cook the corn in a microwave by steaming with 3 tablespoons of water in a covered glass container. Drain and rinse the corn as directed. Place the corn in a large mixing bowl and add the rinsed lima beans. Add the cherry tomatoes to the corn and limas, and stir in the onion and cilantro.
2. In a large mixing cup, whisk together the lime juice,
ají panca
paste, olive oil, agave syrup, dried oregano, and salt until well mixed. Pour over the vegetable mixture, top with a few twists of fresh pepper, and use a large wooden spoon or rubber spatula to stir the vegetables until thoroughly coated with dressing. Cover and chill the salad for 20 minutes so that the flavors can blend.
•
Serves 4 as a side or starter•
Time: 45 minutes•
Soy Free
This nutritious salad is loaded with Latin America’s greatest hits—corn, tomatoes, peanuts—and of course South American native supergrain, quinoa. Savor immediately to enjoy the amazing combination of the warm quinoa and cool vegetables. For an extra-awesome salad, substitute candied chile peanuts (see page 73) for the plain roasted peanuts.
1 cup uncooked quinoa, rinsed in a
fine-mesh strainer
2 cups water
2 tablespoons lime juice
2 tablespoons good-quality olive oil
1 tablespoon red wine vinegar
½ teaspoon dried oregano
1 tablespoon
ají amarillo
or
ají panca
paste
¾
teaspoon salt
1 red onion, finely chopped
1 bunch spinach (about ½ pound), well
washed and sliced into thin ribbons
1 cup corn kernels, lightly blanched or
roasted (see page 64)
1 large tomato, seeded and diced
⅔ cup kalamata olives, pitted and
chopped
⅔ cup roasted unsalted peanuts,
chopped
1. In a large pan over medium heat, warm the rinsed quinoa until dry and lightly toasted and fragrant, about 6 minutes, stirring constantly. Add the water, bring to a boil, and lower the heat to a simmer. Cover and cook for 20 minutes, or until all the water is absorbed and the quinoa grains are tender, plump, and translucent. Remove from the heat, fluff with a fork, and let cool, uncovered, for 20 minutes.
2. Meanwhile, in a mixing bowl, combine the lime juice, olive oil, wine vinegar, oregano,
ají
paste, salt, and onion. Let the onion marinate for the entire time the quinoa is cooking and cooling in the dressing so that it softens and becomes milder. When the quinoa has cooled, add the spinach, corn, tomato, olives, and pea - nuts. Serve immediately.
5
BEANS AND RICE, LOS DOS AMIGOS
T
his chapter is dedicated to my lifelong best buddies, beans and rice. Try your hand at a few of the following recipes and you may find yourself inviting this dynamic duo over for dinner again and again.
his chapter is dedicated to my lifelong best buddies, beans and rice. Try your hand at a few of the following recipes and you may find yourself inviting this dynamic duo over for dinner again and again.
The combination of beans and rice symbolizes what Latino
comida
is all about: a fusion of the Old World (rice) and the New (the common bean: black, pinto, and so on). Romantic imagery aside, the best thing is that a rice-and-beans meal always satisfies. The combination makes a nourishing complete protein, and you feel like you really ate
something
.
comida
is all about: a fusion of the Old World (rice) and the New (the common bean: black, pinto, and so on). Romantic imagery aside, the best thing is that a rice-and-beans meal always satisfies. The combination makes a nourishing complete protein, and you feel like you really ate
something
.
If you normally shy away from recipes that require a few steps, keep in mind that a batch of beans (and a double recipe of rice) will keep you set with brown bag lunches for at least three days. As a general rule, beans taste better the next day and will also considerably thicken as they cool. Make beans on a lazy Sunday night (simmering away on the back burner while eating faster fare such as tacos) and look forward to flavor-loaded beans for Monday dinner and delicious, almost-thick-as-refried beans by Wednesday. Just goes to show that beans are never boring!
•
Makes 5 to 6 cups of cooked beans•
with 2 to 3 cups of bean broth•
Time: 2 to 2½ hours, not including soaking•
Gluten Free, Soy Free
This is a basic guide to cooking beans from scratch—if you’ve never tried it before, or had problems in the past, making a successful pot of beans from a bag of dried ones will change your life. Maybe not in the “I won the lottery” kind of way, although incredible flavor, perfect texture, easy-to-make, and insanely cheap are a winning combination.
Home-cooked beans made right just taste so much better than canned. In Latin cooking, the liquid that beans are prepared in—bean broth, if you will—is a flavorful ingredient in many dishes. In contrast, the cooking liquid that comes with canned beans tends to be insipid and too salty (which is why recipes using canned beans require them to be well rinsed and drained first). Make beans from scratch and you’ll never have this problem; home-cooked bean liquid is silky, delicate tasting, and only as salty as you want it to be. Check out the Pantry section (page 13) for an overview of some popular Latin dried beans to look for.
1 pound dried beans, such as black beans,
pintos, limas, garbanzos, white, Roman
beans, bola roja, red, and so on
1 to 2 bay leaves
½ to ¾ teaspoon salt
1 (3-inch) strip kombu (Japanese kelp),
or 2 teaspoons dried epazote
(optional)
1. The first step always with dried beans is to sort them to remove any stones, debris, or broken or off-looking beans. Spread the beans on a tabletop and pick out any random particle that doesn’t belong there. I find it easiest as I go through the bean inspection process to sit at the table with a large bowl on my lap and sweep any proper-looking bean off the table and into the bowl.
2. Cover the beans with at least 6 inches of cold water and let sit on the kitchen counter for 8 hours or overnight. It can be helpful to start soaking the beans before you leave for work in the morning, then when you return in the early evening, the beans will be ready to cook.
3. Drain the soaking liquid from the beans, rinse the beans, and place in a large, heavy soup pot with a lid. Add about 5 cups of water or enough to cover the beans by about 4 inches. Stir in the salt and add the bay leaves and kombu or epazote, if using. Cover the pot and bring to a boil over high heat. Sometimes the beans will produce foam as they boil; if so, skim and discard the foam. Lower the heat to low, cover the pot, and simmer the beans for 2 to 2½ hours. If the liquid level gets very low while the beans cook, stir in a cup of water or so at a time until done. Don’t completely drown the beans in water, either (unless you are intentionally making a very brothy soup).
4. Perfectly cooked beans should be very soft with a tender interior and a soft exterior, and will mash easily when pressed with your tongue onto the roof of your mouth. Beans should never be very grainy or crunchy (they’ll be hard to digest; see more next page). If your beans have that texture, keep cooking them until they are actually tender. If they still refuse to get tender, it could be that your beans are very old. Dried beans a year or more older can take a very long time to cook (or possibly never get tender).
5. To store cooked beans: Let them cool completely before pouring the beans with their liquid into containers. Cover tightly and store in the refrigerator for up to about 1½ weeks. You can also freeze beans; I recommend separating them into smaller portions (even small resealable plastic bags) for easy thawing. Thaw beans in the refrigerator overnight, or, if using in soup, add small portions directly to the broth.
Other books
Us by Emily Eck
Juliet by Anne Fortier
Moonweavers by Savage, J.T.
Terminal by Colin Forbes
Sharing Freedom by Harley McRide
The Swans' War 3 - The Shadow Roads by Sean Russell
Divine by Karen Kingsbury
A Missing Peace by Beth Fred
A Life of Bright Ideas by Sandra Kring