Authors: Betsy Matheson
Tags: #Non-Fiction
DIY Projects for the Self-Sufficient Homeowner: 25 Ways to Build a Self-Reliant Lifestyle (17 page)


3 Cut the plates
and studs for the two side walls (called kneewalls). Arrange the parts on a flat surface and assemble the walls by driving three 3" deck screws through the cap and base plates and into the ends of the studs. Make both kneewalls.

4 Set the base plate
of each kneewall on the timber base and attach the walls by driving 3" deck screws down through the base plates and into the timbers. For extra holding power, you can apply exterior panel adhesive to the undersides of the plates, but only if you don’t plan to relocate the structure later.
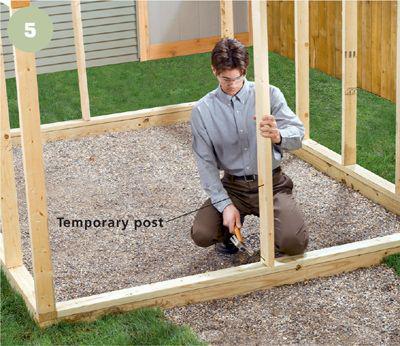
5 Cut the ridge
support post to length and attach it to the center of one end base plate, forming a T. Cut another post the same length for the front (this will be a temporary post) and attach it to a plate. Fasten both plates to front and back end timbers.
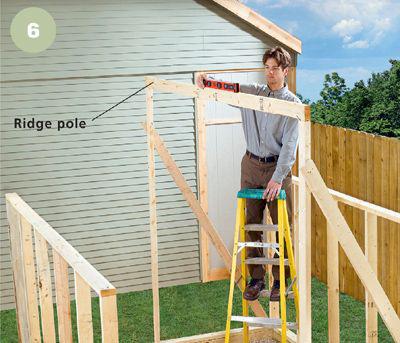
6 Set the ridge
pole on top of the posts and check that it is level. Also check that the posts are level and plumb. Attach a 2 × 4 brace to the outer studs of the kneewalls and to the posts to hold them in square relationship. Double-check the pole and posts with the level.
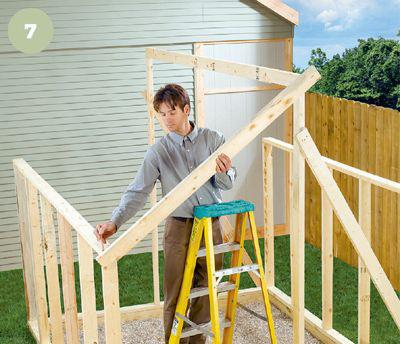
7 Cut a 2 × 4
to about 66" to use as a rafter template. Hold the 2 × 4 against the end of the ridge pole and the top outside corner of a kneewall. Trace along the face of the ridge and the top plate of the wall to mark cutting lines. Cut the rafter and use it as a template for the other rafters on that side of the roof. Create a separate template for the other side of the roof.
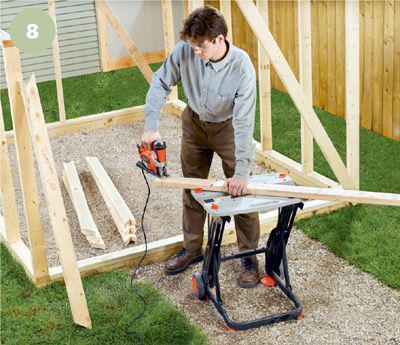
8 Mark cutting lines
for the rafters using the templates, and cut them all. You’ll need to use a jigsaw or handsaw to make the bird’s mouth cuts on the rafter ends that rest on the kneewall.
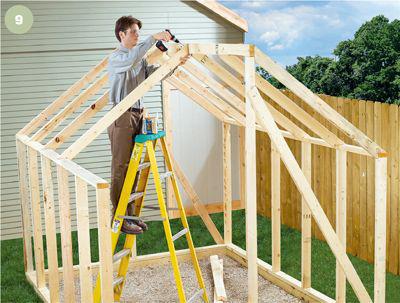
9 Attach the rafters
to the ridge pole and the kneewalls with deck screws driven through pilot holes. Try to make the rafters align with the kneewall studs.
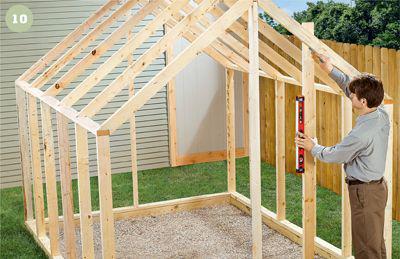
10 Mark the positions
for the remaining end wall studs on the base plate. At each location, hold a 2 × 4 on end on the base plate and make it level and plumb. Trace a cutting line at the top of the 2 × 4 where it meets the rafter. Cut the studs and install them by driving screws toenail-style.
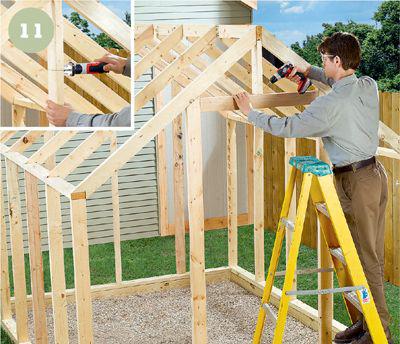
11 Measure up 78"
(or less if you want a shorter door) from the sole plate in the door opening and mark a cutting line on the temporary ridge post. Make a square cut along the line with a circular saw or cordless trim saw (inset). Then cut the door header to fit between the vertical door frame members. Screw the header to the cut end of the ridge post and drive screws through the frame members and into the header.
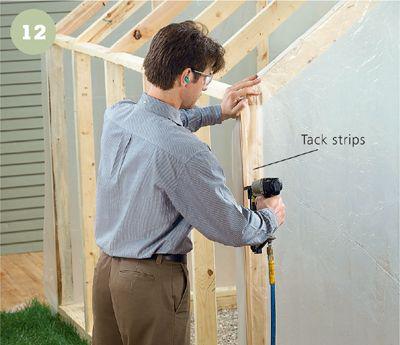
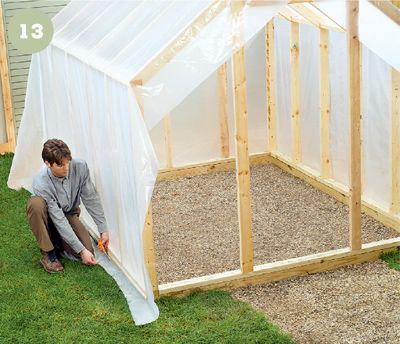
12 Begin covering the
greenhouse with your choice of cover material. (We used 6-mil polyethylene sheeting.) Start at the ends. Cut the sheeting to size and then fasten it by attaching screen retainer strips to wood surfaces at the edges of the area being covered. Tack the sheeting first at the top, then at the sides and finally at the bottom. After the strips are installed (use wire brads), trim the sheeting along the edges of the strips with a utility knife.