Authors: Betsy Matheson
Tags: #Non-Fiction
DIY Projects for the Self-Sufficient Homeowner: 25 Ways to Build a Self-Reliant Lifestyle (24 page)

To double-check that your food is dry, place it in a wide-rimmed, open-topped bowl covered with cheesecloth fastened with a rubber band. Place the bowl in a dry place, and keep the food in the bowl for about a week. Stir it a couple times a day—if any moisture or condensation appears, you should continue to dehydrate.
Enjoying Your Dehydrated Food
Many foods are delicious and ready to eat in their dried forms—especially tomatoes and berries. But dried food can also be rehydrated before eating. To rehydrate food, pour boiling water over it in a ratio of 1-1/2 cups of water to 1 cup of dried food, then let the food soak until all the water has been absorbed. You may also steam fruit or vegetables until rehydrated. Rehydrated vegetables should be cooked before eating, whereas rehydrated fruits are acceptable to eat without cooking after rehydration.
 Pasteurization and Storage
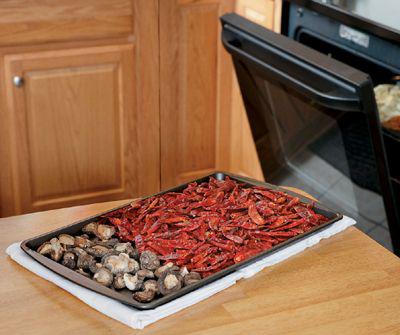
Regardless of the drying method used, food should be pasteurized before storage to ensure that there are no insect eggs or spoilage microorganisms present. To pasteurize, preheat the oven to 175°. Spread dried food 1" deep on trays and bake in the oven for 10 to 15 minutes. Dried food is best stored in clean glass jars or plastic bags in a cool, dry place. Never store dried food in metal containers and carefully monitor the humidity of the storage environment. Containers should have tight-fitting lids and should be stored in a dark, dry place with an air temperature below 60°.
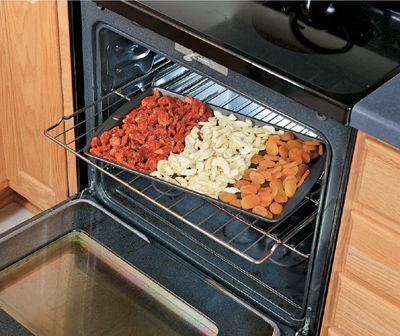
Use your oven
to heat fruits and vegetables to a high enough temperature to kill bacteria and related contaminants. About 15 minutes at 175°F will suffice for most produce, provided it is not in layers over 1" deep. Oven-drying takes about a half day at 140° or so.

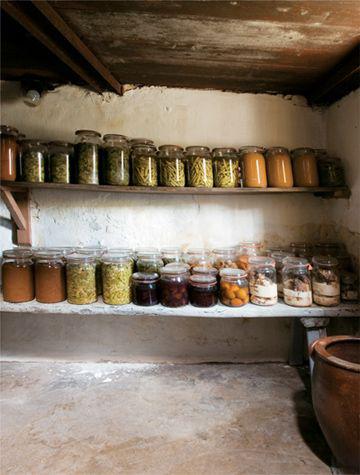
Cool storage areas such as cellars can be outfitted to keep
produce fresh for the table throughout the long winter months. A wide variety of foods will stay fresh and delicious if stored in the right conditions—a space that is damp and cold, but not freezing. Typically, 32 to 40 degrees Fahrenheit is ideal for a root cellar environment. This type of food storage is entirely dependent on thermal mass and the natural cooling of outdoor air during the winter, and this isn’t vulnerable to power outages. Traditionally, root cellars are an underground space built under or near the home, insulated by the ground and vented so cold air can flow in and warm air out in the fall. In the winter, the vents are then closed and the cellar maintains a cold—but not freezing—temperature, thanks to the earth’s insulation.
A root cellar
doesn’t actually need to be underground, although they often are. Any cool, dark area will do.
Of course a walk-in root cellar built like this is the most reliable solution, but you can still practice cold storage without an external walk-in root cellar. The best systems are adapted to each home and climate, and can be as simple as a deep hole in the yard that is carefully covered, to a homemade basement cold room, like the one described on
page 95
.
How to Store Produce in a Root Cellar
How to Set Up a Basement Root CellarModern basements are typically too warm for long-term winter storage, but you can create an indoor version of a root cellar by walling off and insulating a basement corner and adding vents to the outside to let you regulate the flow of cold outside air into the insulated room. Your goal is to create a small room that is well insulated and will remain near freezing throughout the winter months. Cellar rooms are typically quite humid, so be sure to choose insulation materials that will hold up well in a moist environment.
First, choose a location for your cellar that is as far as possible from your furnace, and near a basement window, if possible. The window is a great place to install a vent—simply remove the window glass, replace it with insulated plywood, and run the vent through a hole in the wood. (You could also run a vent through a basement wall—as you would for a clothes dryer.) Choose a northeast or northwest corner location if you can. The more masonry surface in your root cellar room, the better—masonry walls provide thermal insulation to help create the ideal temperature inside. If a northeast or northwest corner won’t work for your basement, choose the corner with the highest outdoor soil height.
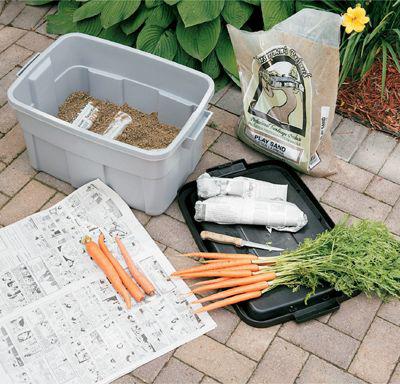
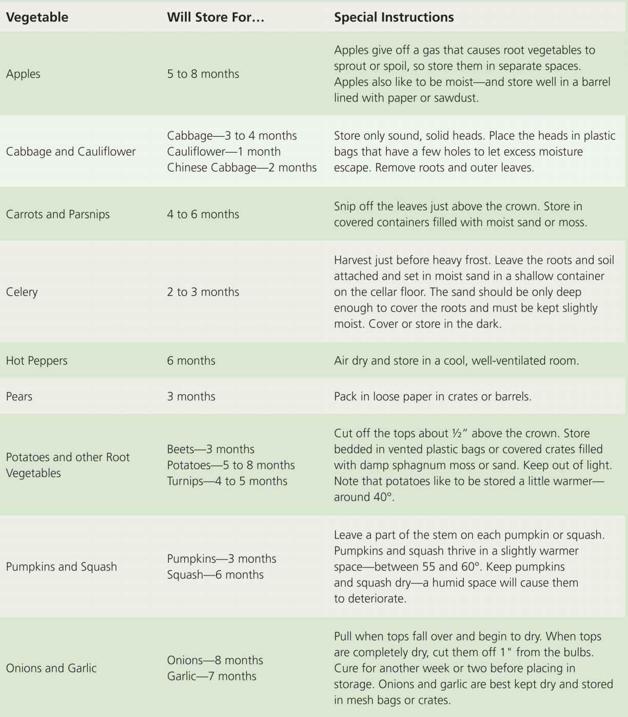
Store only mature
, high-quality vegetables in a root cellar: small, cut, bruised, or broken vegetables will not store well and should be eaten right away. Check on your stored foods frequently to see how they’re doing—if the vegetables begin to grow, the cellar is too warm. If they freeze, the cellar is too cold. If the skin starts to look dry or shriveled, the space is too dry. Remove decaying vegetables immediately to prevent rot from spreading to the rest of your food.