Stitch 'n Bitch: The Knitter's Handbook (11 page)
Read Stitch 'n Bitch: The Knitter's Handbook Online
Authors: Debbie Stoller

2
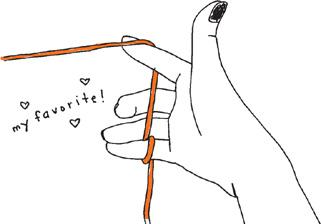
Wrap the yarn counterclockwise around your pinky, then under your ring and middle fingers, and back over the top of your pointer finger. Lightly close your pinky, ring, and middle fingers around the yarn and let it run across the top of your pointer, between the first and second knuckle. This is my favorite method.
1
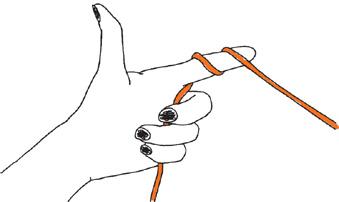
Wrap the yarn clockwise one-and-a-half times around your pointer finger, so that the wraps are between the first and second joint of your finger. The ball end of the yarn hangs down, and your pinky, ring, and middle fingers lightly close around it, to help with the tension. This is a very popular method and is particularly well suited to the Continental way of knitting.
2
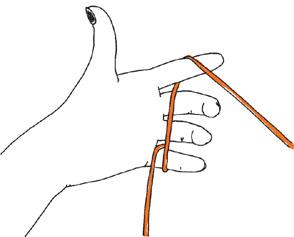
If you crochet, this hold will be easy. Wrap the yarn clockwise around your pinky, then under your ring and middle fingers, and back over the top of your pointer finger. Lightly close your pinky, ring, and middle fingers around the yarn and let it run across the top of your pointer, between the first and second knuckle.
THE ANATOMY OF A STITCH
You already know that a knit stitch is a loop that hangs off your needle, but it’s also important to know exactly
how
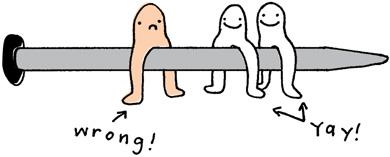
it hangs off the needle—since there’s a right way and a wrong way. I like to think of the loop as a little gymnast straddling a balance beam, with one leg in front and the other in back. Your knitting needle is the beam, and the leg in front is the side of the loop that’s hanging closer to you, the leg in back is the one that’s farther away.
The thing to know is that the leg that’s in front should be the leg that’s on the right side of the loop, and the leg in back should be the one on the left side of the loop. If you’re knitting and a stitch falls off the needle, it’s super-important that you put that gymnast back on the balance beam that way: with the leg on the right side in front, and the leg on the left side in back. Another way to think of it is that the leg in front should be the one closer to the tip of the needle.
How to Bind Off Your Work
There’s one last thing you need to know, and that’s how to get the darn thing off the needles when you’re done. Otherwise, you’d be walking around with a scarf that had a big pointed stick at one end. Okay, maybe you’d like to rock a stick-in-the-mud look this season, but it’s still a good idea to know how to get those stitches off the needle and how to secure them so they don’t unravel. It’s called
binding off,
and it’s easy. Really. Here’s how:
1
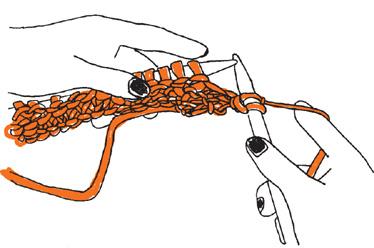
Starting at the beginning of a row, knit a stitch. Let’s call it Sally. Knit another stitch and call it Harry.
2
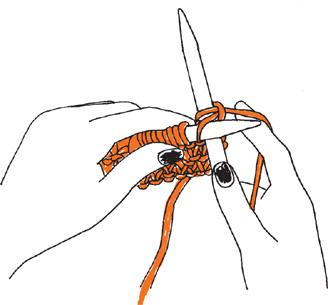
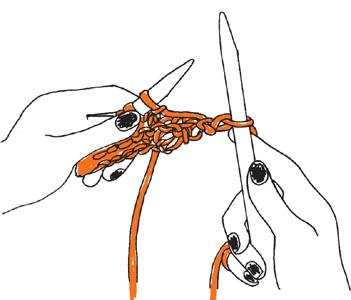
Slide the tip of the left needle under Sally’s front leg (the first stitch you knit).
3
Then let Sally play leapfrog with Harry (the second stitch), by lifting Sally up and over Harry and then letting her drop off the tip of the right needle.
4
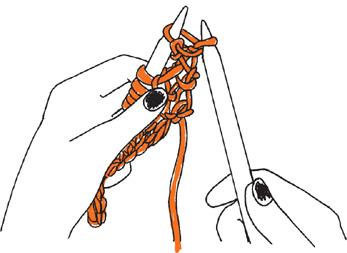
Only Harry is left on the right needle.
5
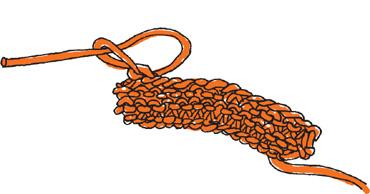
Repeat steps 2 and 3 over and over again, knitting a stitch, then leapfrogging the previous stitch over it, until all of your stitches have been bound off, and you’re left with only one stitch. Cut the yarn about 6 inches from the end and pull it through that last stitch, tightening gently.
O
UT WITH THE
O
LD
: H
OW TO
S
TART A
N
EW
B
ALL
You can knit for a good long time with one ball of yarn, but eventually you’ll run out. The best place to start a new ball of yarn is at the beginning of a row, so you don’t have a big ol’ ugly knot right in the middle of your scarf. How do you know if you have enough yarn left to finish a row? If you have about three times the width of your piece remaining, go ahead and knit the row. If you don’t, get ready to start a new ball.
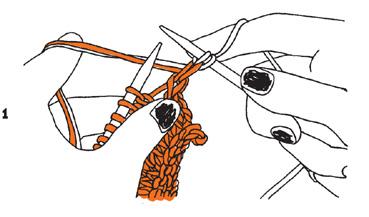
Cut the old yarn, leaving about a 6-inch-long tail. Hold this tail and the beginning 6 inches of the new yarn together with your left hand. Now just start knitting with the yarn. Don’t worry that the very first stitch is a little loose, you can fix that later.
(figure 1)
Knit about 6 stitches, stop, and tie the ends of the yarns together in a nice, neat little square knot. Later when it’s time to work away the ends, you can untie that knot.
(figure 2)
