Authors: Betsy Matheson
Tags: #Non-Fiction
DIY Projects for the Self-Sufficient Homeowner: 25 Ways to Build a Self-Reliant Lifestyle (39 page)

Most homes, and especially older ones, are beset by one
stubborn room that just never quite warms up—whether it’s a remote second floor bedroom, a kitchen or dining room with large, north-facing windows, or a main floor office in the corner closed off from the home’s central heating system. Operating an electric space heater can help you warm up in the short-term, but is not an energy-efficient or long-term solution to this problem. One very efficient long-term solution, however, is to build and install hot-air solar panels. Even if you don’t have a cold spot, a supplementary solar heat system can save plenty of energy dollars.
When combined,
these three DIY “hotboxes” introduce enough hot air into this home to carry 30 to 40% of the home heating load.
Using solar energy to heat a cold space in your home is a great way to harvest the sun’s energy and supplement your home’s heat in these problem areas. Solar hot air panels are fundamentally different than photovoltaic panels—this style is designed to use the sun’s energy to heat the air inside each box rather than to create electricity. Mounted on a south-facing wall or on the roof, solar hot air panels collect air from inside your home and blow or draw it through the thermal solar panels, which are essentially a series of metal ducts in a black box under tempered glass. As the air moves through the ductwork, the sun’s rays cause it to heat to high temperatures. Then, at the end of the duct, another vent moves the air back into your home’s heating ductwork or an interior vent, sending the now-heated air right into the home.
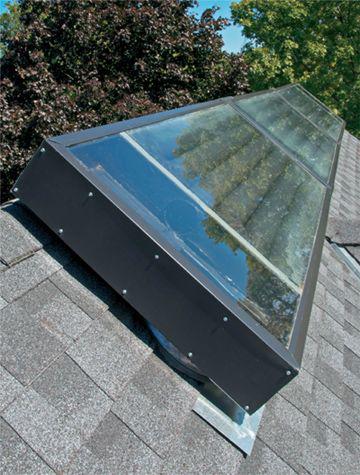
You can build solar hot air panels yourself. This style seen here is simple: essentially, a box, a series of ducts, and a piece of glass. The panels are permanently installed and ducted in to your home, complete with automated thermostatic controls. In this project, we’ll walk you through one version of a solar hot air panel designed and installed by Applied Energy Innovations of Minneapolis, Minnesota (see Resources p. 158), with the help of homeowner Scott Travis.
Anatomy of a Hot Air Solar Panel
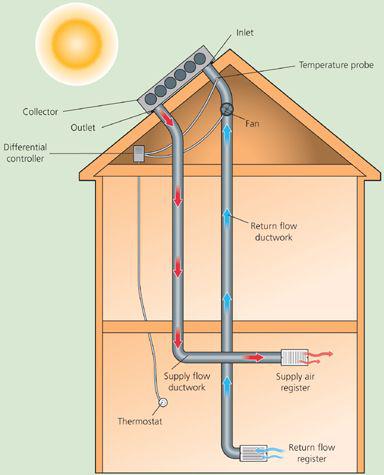
The solar hot box
is a very simple system. Cold air from the house is drawn up into a network of ducts in the collector, where it is warmed by the sun then circulated inside to heat the house.
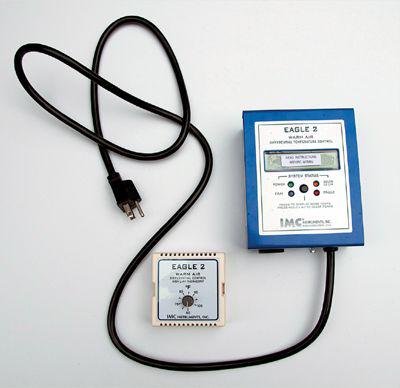
The temperature control
equipment opens and closes the damper and causes the blower fan to turn on and off as needed.
TOOLS & MATERIALS
Jigsaw or circular saw with metal-cutting blade
Drywall saw
Straightedge
Aviation snips
Tape measure
Eye and ear protection
Carpenter’s square
Drill/driver with bits
1/8" pop rivets
Pop rivet gun
High-temperature silicon caulk
Caulk gun
Aluminum foil tape
1"-thick R7 rigid insulation
2 × 6 steel studs
Utility knife
Tempered glass
4" hole saw
Sheet-metal start collars
8" plenum box (2)
4" male and female duct connectors
1"-wide closed-cell foam gasket
4" aluminum HVAC duct
High-temperature black paint (matte)
Trim paint roller
Sheet-metal screws with rubber gaskets
Chalkline
Cardboard
Scissors
Reciprocating saw
Roof jack
Roofing cement
Flashing
Rubber gasket rooting nails
Shingles (if needed)
Unistrut
Unistrut connectors
Duct collars (2)
3/8" threaded rod
Spring-fed 8" backdraft dampers
8" blower fan
Temperature controls
How to Build a Solar Hot Air Panel
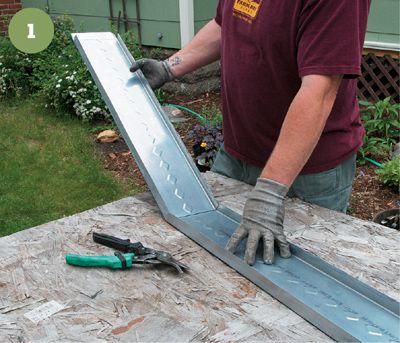
1 Cut and bend
the box frame pieces from 2 × 6 steel studs. Each steel stud piece will wrap two sides of the panel with a 90° corner bend. Mark the bend location on both steel studs. Cut a relief cut into the 6" side of the stud with aviation snips at this mark. Bend the stud to an L-shape and use a square to ensure that the corner forms a true 90° angle.
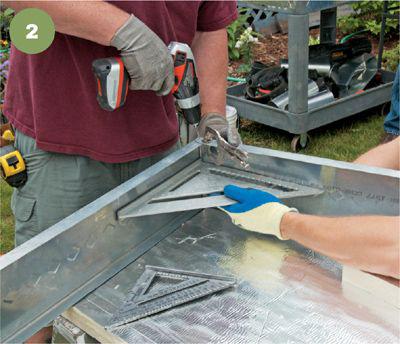
2 Drill 1/8"-dia. holes
in the overlapping top and bottom flanges. Clamp the corners together before drilling and use a square to make sure the corner forms a 90° angle.
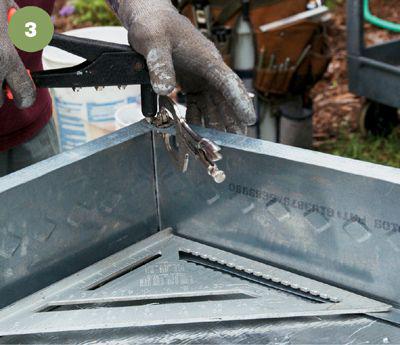
3 Fasten the corners
of the metal box with two 1/8"-dia. sheet-metal pop rivets in the top and bottom. Leave one corner open to create access for the insulation panel insert.
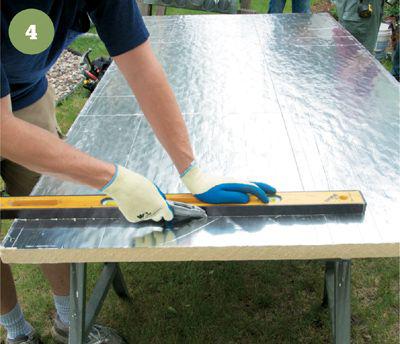
4 Cut the foil-faced rigid foam
insulation to match the interior dimensions of the box, using a drywall saw or a utility knife.
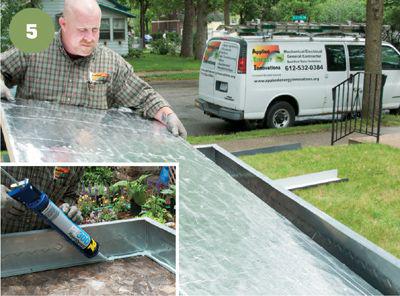
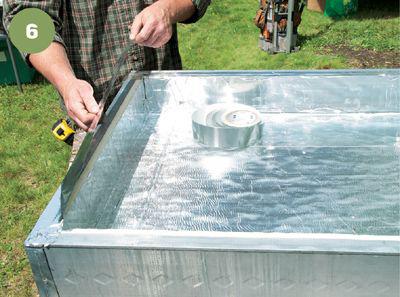
5 Apply high-temperature silicon
to the bottom flanges of the box (inset). Fit the 1" foil-face rigid foam insulation into the back of the frame, then close up the box and secure the open corner. Cut 5"-wide strips of foam insulation to the length and width of the panel. Place a thick bead of silicon around the outside perimeter of the unit. Insert the strips into the silicon and tightly against the sides of the panel to hold the backing firmly in place. The foil should be facing into the box.