DIY Projects for the Self-Sufficient Homeowner: 25 Ways to Build a Self-Reliant Lifestyle (40 page)
Authors: Betsy Matheson
Tags: #Non-Fiction

6 Seal the insulation edges.
Place a bead of silicon around the inside corner where the insulation strips and backing panel meet, and then seal with foil tape. Flip the panel over. Place a bead of silicon on the intersection of the 2 × 6 stud flange and the back of the insulation and seal with foil tape. Conceal any exposed insulation edges with foil tape.
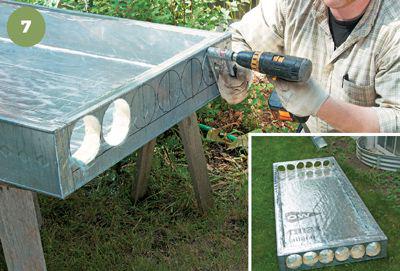
7 Create inlet and outlet holes
in the walls with a hole saw or circle cutter. The number and location of the ductwork holes depends on where each panel fits into the overall array (presuming you are making and installing multiple panels). The first and last panels in the series each will have one end wall that is uncut, while intermediate panels will have duct holes on each end wall (inset).

8 Install a compartment separator
in the first and last panels with a piece of foil insulation set on edge. Cut ductwork access holes in the separator. Then, cut out holes for the ductwork that will pass through the separator. Also cut a plenum opening in the separated compartment in the first and last unit.
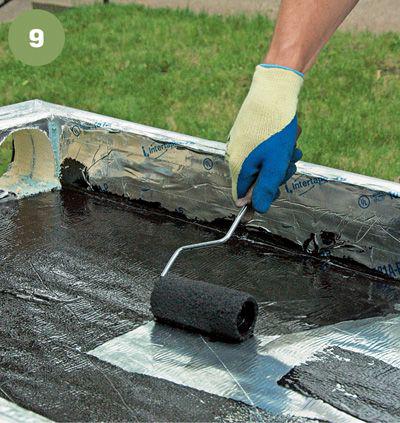
9 Paint the entire box interior
black using high-temperature paint and allow it to dry completely. A trim roller works well for this task.
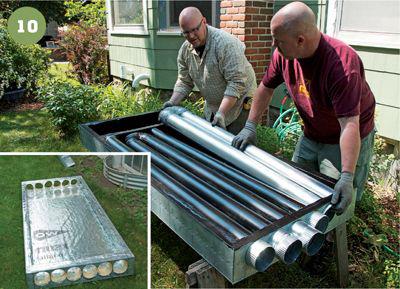
10 Insert the ductwork.
Beginning at the plenum over the inlet duct, guide 4" aluminum HVAC ductwork in a serpentine shape throughout the entire multi-panel installation, ending at the outlet duct. Join ends of adjoining duct sections with flexible duct connectors fashioned into a U shape and secured with metal screws and foil tape (inset). Paint each section of ductwork with black high-temperature paint once it is in place.
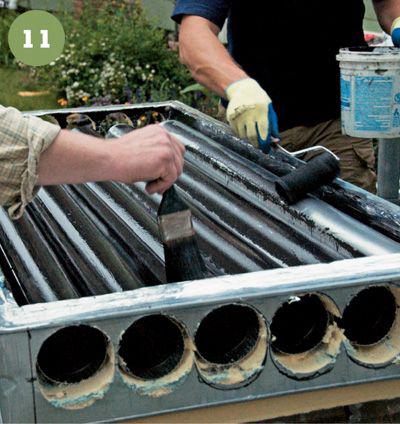
11 Paint the last
section of ductwork and touch up around the interior of the box so all exposed surfaces are black.
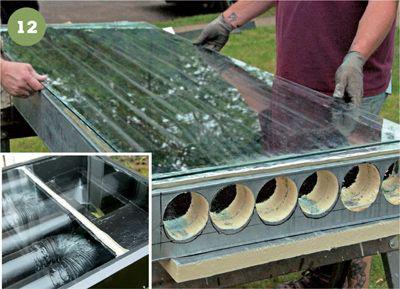
12 Affix the glass top.
First, double check that all openings in the panel are adequately sealed and insulated. Then, line the tops of the steel stud frame with foam closed-cell gasket tape. Carefully position the glass on top of the gasket tape, lined up 1/2" from the outside of the frame on all sides. Then, position foam closed-cell gasket tape around the perimeter of the top of the glass panel.
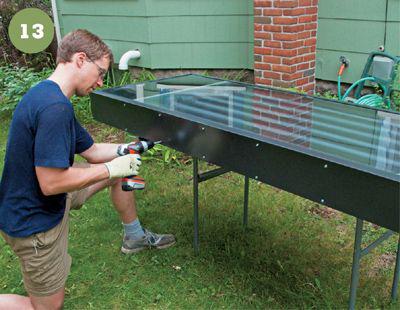
13 Attach the casing.
Work with a local metal shop to bend metal flashing that will wrap your panel box. Attach around the perimeter of the panel with sheet-metal screws with rubber washer heads.
TIP:
Be careful when working around the plenum ductwork. If you set the unit down on its backside, you will force the plenum up and break the seal around the opening.
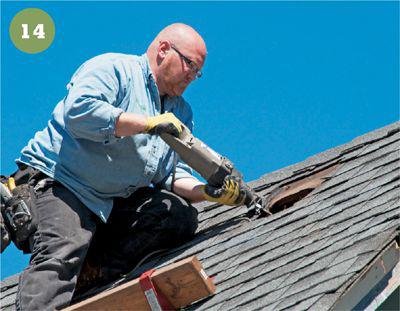
14 Mark off the panel layout locations
on the roof. Transfer the locations of the 8"-dia. inlet and outlet holes to the roof as well. The location of these holes should not interfere with the structural framing members of your roof (either rafters or trusses). Adjust the panel layout slightly to accommodate the best locations of the inlet and outlet, according to your roof’s setup. Cut out the inlet and outlet holes with a reciprocating saw.
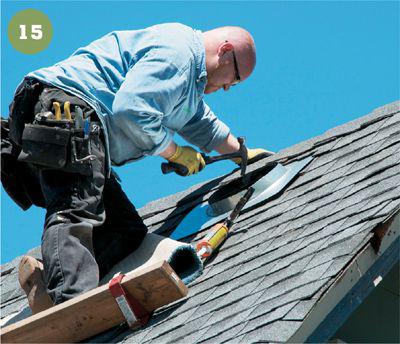
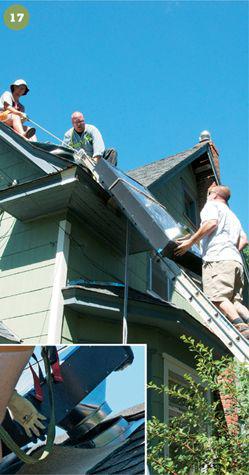
15 Use a roof jack
or Cone-jack to form an 8"-dia. opening. Apply a heavy double bead of roofing cement along the top and sides of the roof jack. Nail the perimeter of the flange using rubber gasket nails. Cut and install shingles with roofing cement to fit over the flashing so they lie flat against the flange.
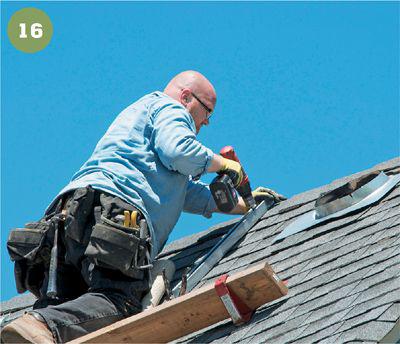
16 Attach Unistrut mounting
U-channel bars to the roof for each panel. Use the chalklines on the roof to determine the position of the Unistrut, and attach to the roof trusses with Unistrut connectors.