Help Me! Guide to iPhone 6: Step-by-Step User Guide for the iPhone 6 and iPhone 6 Plus (30 page)
Read Help Me! Guide to iPhone 6: Step-by-Step User Guide for the iPhone 6 and iPhone 6 Plus Online
Authors: Charles Hughes
Tags: #Encyclopedias

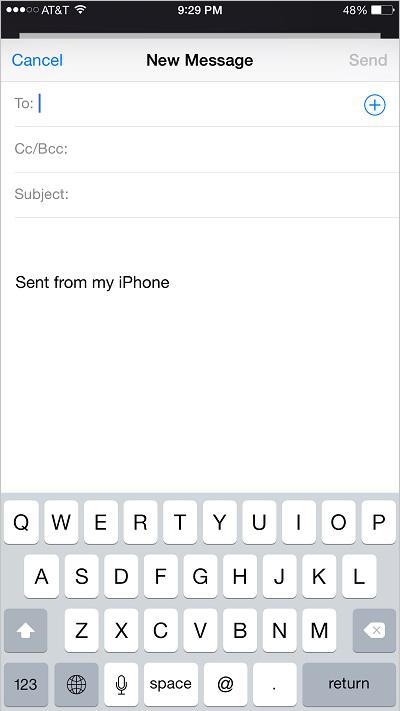
 Figure 6: New Email Screen
While composing an email, you may wish to refer to another message for reference. To do so, touch and hold
New Message
at the top of the screen, and drag your finger to the bottom of the screen. The New Message screen is hidden, and you may use the Mail application normally. To continue writing your email where you left off, touch
New Message
at the bottom of the screen. If you have already entered a subject, 'New Message' will be replaced by the subject.
When writing an email on your phone, you can format the text to add bold, italics, underline, or increase the quote level.
To add bold, italics, or underline text while writing an email:
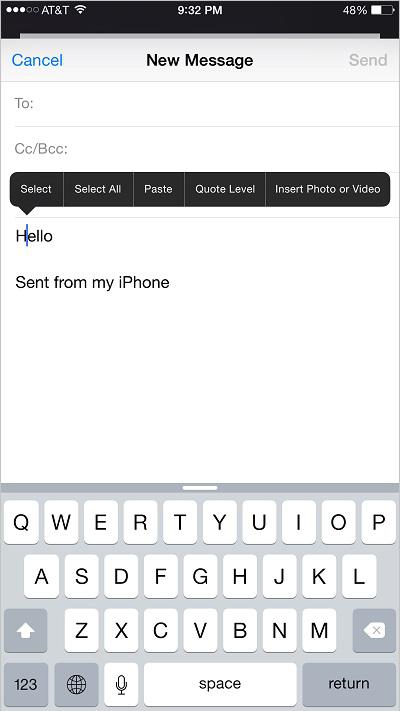
1. Touch and hold the text in the email that you wish to format. The Select menu appears above the text, as shown in
Figure 7
.
2. Touch
Select All
. All of the text is selected. To select a single word, touch
Select
. Blue dots appear around the word or phrase.
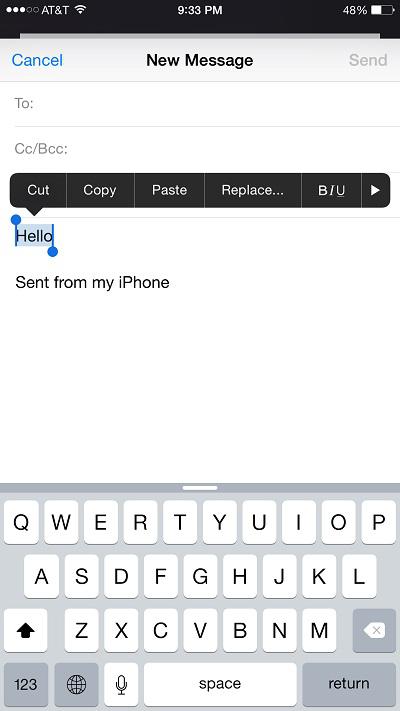
3. Touch and hold one of the blue dots and drag it in any direction. The text between the dots is highlighted and a Text menu appears, as shown in
Figure 8
.
4. Touch the button. 'Bold', 'Italics', and 'Underline' appear. If you do not see
 button, touch the
 button in the Text menu.
5. Touch one of the formatting options. The associated formatting is applied to the selected text.
You can also increase the left margin, or quote level, in an email. To increase the quote level:
1. Touch and hold any location in your email. The text cursor flashes in the selected location.
2. Touch the button in the Text menu. The Text Format menu appears.
3. Touch
Quote Level
. The Quote Level options appear.
4. Touch
Decrease
or
Increase
to adjust the Quote Level accordingly. The new Quote Level is set and applied to the paragraph where the text cursor is currently flashing.
 Figure 7: Select Menu
 Figure 8: Text Menu
After receiving an email, you can reply to the sender or forward the email to a new recipient. To reply to, or forward, an email message:
1. Touch the icon. The Mail application opens.
2. Touch an email. The email appears.
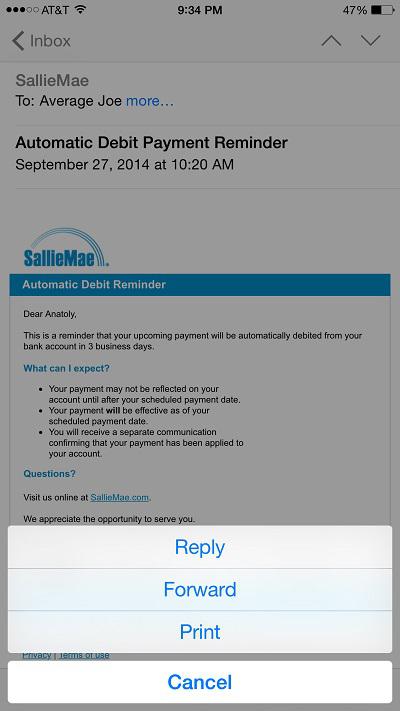
3. Touch the button. The Reply menu appears, as shown in
Figure 9
.
4. Touch
Reply
to reply to the message, or touch
Forward
to forward the message. The New Message screen appears. The subject at the top is preceded by 'Re:' if replying or 'Fwd:' if forwarding. The original email is copied in the body. If replying, the addressee field is filled in.
5. Touch the text field next to 'To:', and enter an addressee, if necessary. The addressee is entered. The address of the sender is automatically entered when replying to an email.
6. Touch the text field to the right of 'Subject' to enter a different subject for your message, if desired. The subject is entered.
7. Touch the text field below 'Subject' and enter a message, if desired. The message is entered.
8. Touch
Send
at the top of the screen. The email is sent.
Note: When forwarding an email, the attachment menu will appear if the original message has an attachment. Touch
Include
if you wish to include the attachment when you forward the email. Otherwise, touch
Don't Include
.
 Figure 9: Reply Menu
While composing an email, you may wish to attach a picture or video to send to the recipient. To attach a picture or video to an email:
1. Touch and hold anywhere in the content of the email. The Select menu appears above the text.
2. Touch
Insert Photo or Video
. A list of photo albums stored on your phone appears, as shown in
Figure 10
.
3. Touch the photo album that contains the photo that you wish to attach. The photo album opens and a list of photo thumbnails appears, as shown in
Figure 11
.
4. Touch the photo that you wish to attach. A preview of the photo appears.
5. Touch
Choose
. The selected photo is attached. Alternatively, touch
Cancel
to return to the list of photos.