Stitch 'n Bitch: The Knitter's Handbook (18 page)
Read Stitch 'n Bitch: The Knitter's Handbook Online
Authors: Debbie Stoller

3
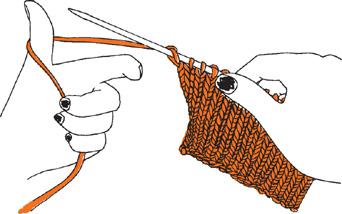
Take your left needle and slip it through the front legs of those two stitches, from left to right. Your left needle should be in front of your right needle.
4
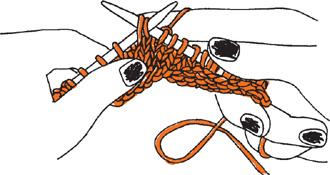
With the needles in that position, make a knit stitch by wrapping the yarn around, pulling the loop through to the front, then dropping the old loops off the left-hand needle.
Slip, Knit, Pass Slipped Stitch Over (skp)
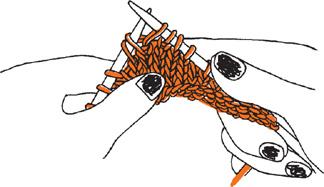
This is a rather popular decrease that, like ssk, also slants to the left.
1
Slip one stitch knitwise.
2
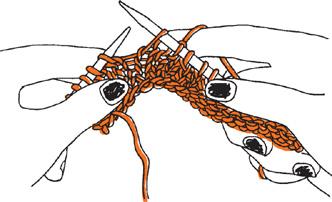
Knit the next stitch.
3
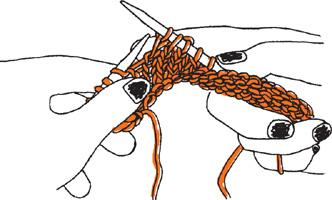
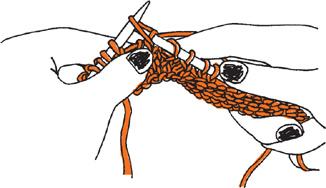
Insert the left needle into the front leg of the slipped stitch and lift it over the stitch you just knit, leapfrogging it over and off the needle—just like you do when you’re binding off.
UNDER
WHERE
? PLACING INCREASES AND DECREASES IN YOUR KNITTING
Increases and decreases are usually made only on the right (front) side of the fabric. (Remember that when knitters talk about the right side of the fabric, they mean right as opposed to wrong, not right as opposed to left.) The right side of the fabric is the front side—the one shown to the world when the piece is worn. The wrong side of the fabric will be against the body, where the sun don’t shine. So, if a pattern tells you to increase one stitch at each end of a row (increases are usually paired) on the following and every alternate row (and this is often how patterns are written), it means that when you are knitting on the right (front) side of the fabric, you will increase one stitch at the beginning of the row and increase another stitch at the end of the row. On the next row, the wrong side, you won’t do anything except purl (or knit, or whatever) straight across.
To avoid raggedy edge stitches, make increases and decreases at least one, and sometimes two, stitches in from the edge, leaving the selvage (the edge that usually gets enclosed in a seam) all nice and smooth for sewing later on. This method also leaves a nice-looking band of sloping stitches at either end of your work. For a wider band, just make your increases or decreases even farther in from the edge.
For sloping edges, make a left-slanting decrease at the beginning of a row, and a right-slanting decrease at the end of a row. A decrease that slants to the left (ssk or skp) is a good one to use at the beginning of a row, since that side will slant toward the left as you narrow your fabric. When made one or two stitches in from the edge, a nice left-slanting band of stitches can look mighty purty on fabric that also slants to the left. A decrease that slants to the right, like k2tog, is best used at the end of the row, one or two stitches in from the end, to create a corresponding right-slanting band of stitches on that side. Here’s how this is written in knitting instructions: “knit until you have 4 stitches left, k2tog, k2.”
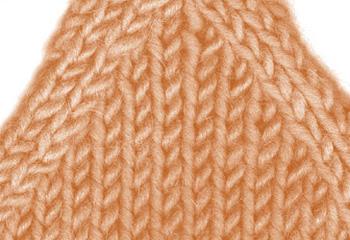
Decorative paired decreases
Decreasing by Binding Off
When you need to decrease more than one stitch in a row, or you want to make an L-shaped angle in your knitting rather than a sloping edge, you will have to bind off those stitches, rather than use any of the decreases described above.
Stitches can be bound off at the beginning of rows or at the center of a row
—you should never try to bind off stitches at the end of a row (if you do, you won’t be able to turn your work and knit back).
Binding off stitches is simple: Just knit two stitches and leapfrog the first stitch over the second stitch (see
pages 40
–41). Then knit another stitch, and leapfrog again. Repeat that for the required number of bound-off stitches, then knit the rest of the row in the regular way.
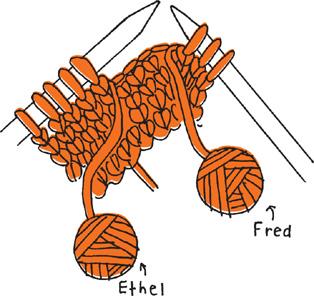
Most often, you’ll bind off stitches at the beginning of a row, but sometimes you’ll need to bind off stitches in the center of a row—for instance, when shaping a neckline. And this is where things can get a little hairy. It all starts innocently enough: You knit up to a certain point in your row, then you bind off a number of stitches in the center of your fabric (this is the bottom center of the neckline), and then you continue knitting to the end. On the next row, you knit until you get to the bound-off point—and that’s when it hits you. The rest of your stitches are stuck on the other side of the needle, past the stitches you just bound off! So how do you get to them?
Well, what you do is you drop the yarn you are working with and knit the stitches on the other side of the gap with another ball of the same yarn. Genius! If you don’t have another ball of the same yarn, just wind one up starting from the other end of the ball you are working with, and cut it off. From that point on, you will knit with this ball (let’s call it Fred), till you get to the end of your row. Then, turn and knit using Fred till you get to the gully. Drop Fred. Pick up Ethel (the original yarn) and knit the rest of the row. At the end, turn around and knit back with Ethel, till you reach the gully. Then just grab Fred again.
Casting On Stitches
Just as binding off stitches makes a swift, slope-free right angle at the edge of your fabric, casting on stitches allows you to make a new bit of fabric jut out at a right angle from the piece you are knitting. And, unlike binding off, casting on can be done at the beginning or at the end of rows. Unfortunately, you can’t use the double cast-on method because that requires having two strands of yarn, and you have only one (since you’re already knitting). Instead, use one of the following cast-on methods:
The Single Cast-on
This is the easiest method to use when you need to add a few stitches to the beginning or end of your row.
At the beginning of a row:
1
Take the needle (with all the stitches on it) in your
right hand
, and close the bottom three fingers of your left hand around the ball end of the yarn. Then, let the yarn run across your palm and over your thumb,
clockwise
.
