Sew What! Bags: 18 Pattern-Free Projects You Can Customize to Fit Your Needs (25 page)
Read Sew What! Bags: 18 Pattern-Free Projects You Can Customize to Fit Your Needs Online
Authors: Lexie Barnes

CUT YOUR FABRIC
1.
DECIDE YOUR SIZE
. You can build a backpack to carry your groceries, take your stuff to the gym, or use as a funky everyday purse. Bring out your gear or gadgets and lay them out. How much space do you need? We added one pocket to our pack, but you could easily tack on a few if you want more of them. Try a few variations.
2.
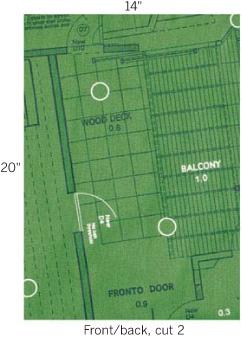
CUT YOUR FABRIC
. Draw the pieces on the wrong side of the fabric and cut out the following:
two backpack panels
3.
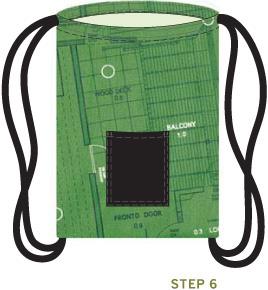
MAKE AND ATTACH THE POCKET
. Make a pocket as described on page 43. With both pieces right side up, pin the pocket onto the front backpack panel. (Ours is centered about 4" from the bottom.) Edgestitch around three sides of the pocket, backtacking at ends. Topstitch another line ¼" away from the first line and backtack.
4.
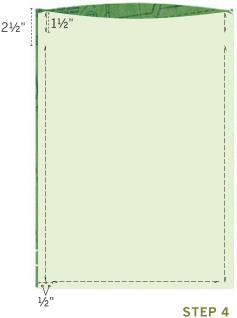
STITCH THE SIDES
. With right sides together, pin the backpack along the sides and bottom edge. Measure and mark 1½" and 2½" down from the top of each side. This will become the top slot for the straps. Along the bottom edge, measure and mark ½" (which will be the seam allowance) and another ½" in from the sides. This will be the bottom slot for the straps. Stitch the sides and the bottom between the marks as shown, backtacking at the start and end of all stitching.
5.
MAKE A CASING
. Press open the backpack side seams and stitch on either side of the opening (
see pages
44
–45.) Press under the top raw edges ½", then repeat for another 1". Edgestitch along the bottom fold. Turn the backpack right side out.
6.
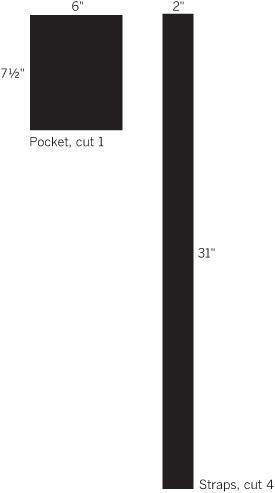
MAKE AND ATTACH THE STRAPS
. Stitch the short end of two 31" strips together to make one long 60" strap. Repeat with the remaining two strap pieces. Make two straps as described on page 42. The finished straps will be ½" wide. Thread each strap through the top casing, one through the front and one through the back. On the bottom of the pack, slide two ends into each of the ½" slots at the side corners, knot them, and pin them into place. Turn the pack wrong side out and stitch the corner openings closed with the knots inside, backtacking to reinforce. Trim the seams, turn the bag right side out, and press.
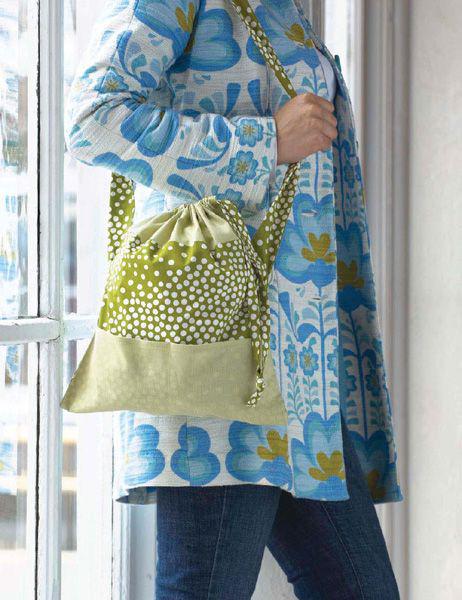
SKILL LEVEL
pro
Originally designed to hold clothespins, the Sling Sack can be a great help when hanging laundry out in the fresh spring air. It is also easily tailored for other uses, this bag is ideal for crafters, painters, or makeup artists — anyone who needs to cart around special supplies in an expandable sack.
OUR FINISHED SIZE:
12" × 13", 30" strap
WHAT YOU’LL NEED
see page
18
)
WHAT YOU’LL DO